Creating Datasets for RVC Using iZotope RX11
In this guide I will be explaining how to use a "Paid Software" to clean audio for training models.
iZotope RX is known to be the software for denoising audio and the one used by "every" good model maker.
Compared to the previous guide with RX10, there has been drastic changes to how audio is approached for cleaning
This guide also has steps which uses Audacity, a free software that has been recommended by AI HUB in their respective guide here
The process has gotten simpler after learning about what aspect of the audios are compatible with RVC so i'll be covering topics that weren't discussed in the previous RX guide and retreading on parts that were fine before
If you want to skip ahead to a section:
Getting a Dataset
Getting the highest quality audio works best for Izotope and will result in a better model. Ideally, you want to preserve the dynamic range, the frequencies, and the fidelity/clarity.
If you're working with low quality audio, RX cannot upscale or restore the missing details that were originally there. The end result will be audible as the voice model quality will be muddied with artifacts/tearing.
Mic proximity is also another factor to consider as you want the voice to be consistent since RVC does not handle audio frequency response well and will muffle the pronunciation of words. Keep this in mind for studio sessions and video game voice lines rips as it may have been bass boosted, compressed, or eq'd by default. Arguably, more variation of the voice will add to the vocal range of the model but we want to keep the accent consistent as well
Any manipulation with the audio is not good so don't even think about using an AI upscaler.
SCRFilms already covered a portion of the terms and where to rip audios from his guide here so i'll add a few tips of my own
For Youtube ripping
You can use Cobalt, yt-dlp, or Loader.to. Overall, yt-dlp is the best for ripping.
Preferably rip the audios in Opus format so the downloaded audio will be 48khz, which can be resampled down to 44.1k on Izotope and trained on 40k via RVC. The quality depends on what is uploaded on the server side so this might not always be the case
For YT-dlp, the command prompt is:
yt-dlp -x
ffmpeg -i audio.opus audio.wav
or
yt-dlp.exe --audio-format wav -x https://www.youtube.com/watch?v=5aYwU4nj5QA&t=2s
Resampling down to 32k is also fine since it results in less harsher sibilance and -plosives for your model
- Sibilance's are the hissing sounds when a person speaks, and plosives are the sounds of air that are released through the mouth. They are both considered consonant sounds with RVC.
Whenever you export the dataset, you can export it to WAV 32-bit. For Flac files, use 24-bit. We never use MP3 files since RVC heavily compresses those audio files
Loading The Audio And Changing Settings
Open the WAV or FLAC file
now that we have the file in RX
make sure to turn this slider to the right to show the Spectrogram only
 now after that it should look like this

this is using Mel scaling, if you right click on the numbers list(20k and such). you can change the scaling.
Mel is the best scaling in our case since it shows vocals better than Linear scaling would.
the brighter a color on the spectrogram, the louder it is and will be audible
the spectrogram in the example is slightly above a frequency of 15khz. Take the khz x 2 and it would equal to a 32k audio. If it were 20khz, then it'll be a 40k audio
32k is the lowest sample rate you can train on in RVC if your khz is below 15
Trying To Explain a Spectrogram
Spectrograms are graphical representations of frequencies which can determine whether your audio sample rate is 32k, 40k, or 48k.

There is a distinction between high-end frequency and low-end frequency in a spectrogram. The high-end frequency (48k-40khz), or the air region in the chart isn't audible for the human ears. But, it'll help to handle aliasing. Aliasing is the effect of new frequencies appearing in the sampled signal after reconstruction, that were not present in the original signal. In other words, it creates artifacts to your model
meanwhile you can hear some of the low-end frequencies. If you were to resample from 40k to 32k, then most of the high-end and low-end frequencies are gone at the cost of less harsher sibilances and -plosives sounds like I mentioned before

Example of Audios Through a Spectrogram
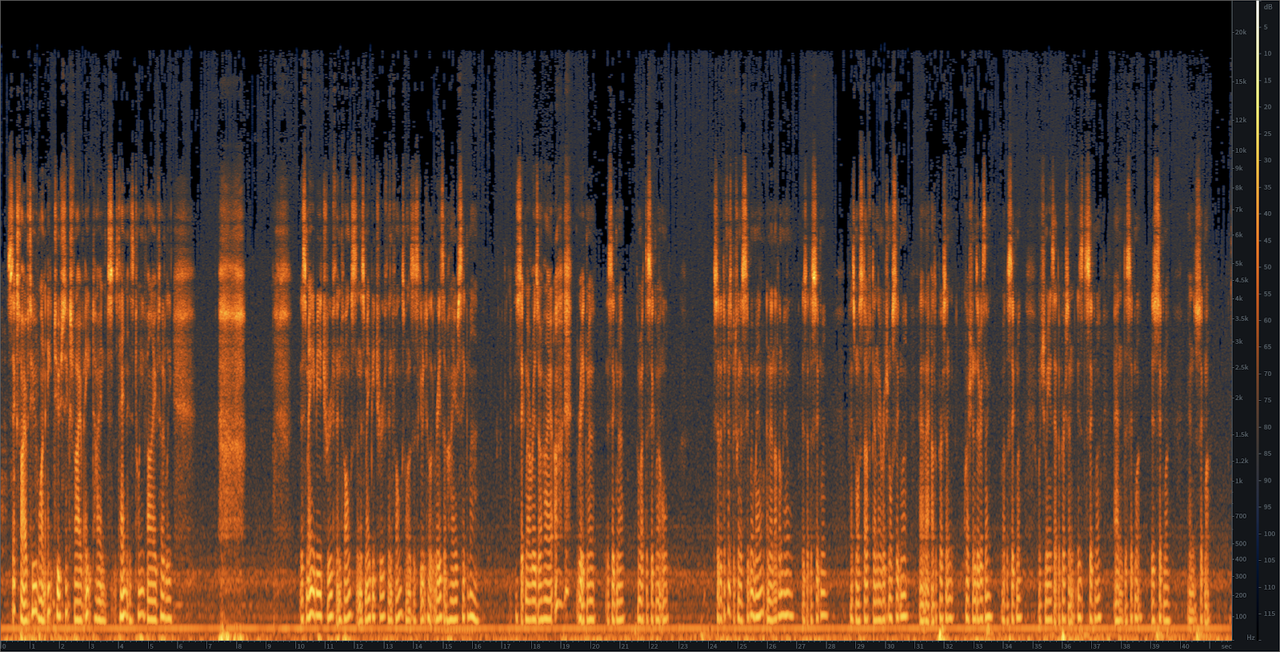
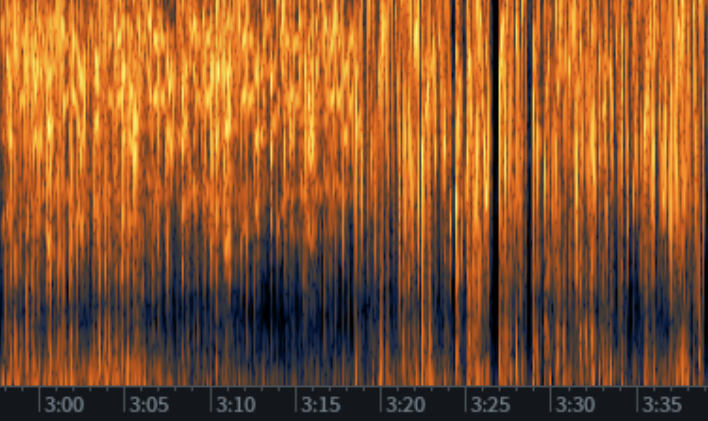
for example, this is noise. The orange area may look like breathing that's masked under the artifacts, but RVC will consider this noise as it's barely audible and you'll only hear static or dry air. The blue areas surrounding the audio are also noise. You can think of these as layers that needs to be removed when we use the Spectral Denoise module later

Now this is breathing. Keep in mind that RVC will consider "soft breathing" as a white noise if the breath sounds are too low (around -40db). Proper vocal breathing are grunts like "huffs, "hahhhhs, "hoohhhhhs". There cannot be harsh inhaling sounds. Breathe sounds by itself without a voice or tone behind it will also cause RVC to think it is noise. Without breathes, the model sound will robotic

and this is speech:

Preparing the Dataset Through Music/SFX Removal
The key principal behind preparing your dataset is doing the least audio processing as possible as you want to keep the overall robustness of the model. Excessively stacking vocal separator models such as UVR Inst Voc, Kim Vocals, Denoise, ensemble mode, and so forth can introduce noises to your dataset as it rips away frequencies from your audio. This harms the model fidelity and quality.
RX De-Clipping
This helps to remove most of the clipping that is occurring throughout the audio around the -0db range. Do not touch the make-up gain as it will alter the natural dynamic range of the audio. You can press "preview" to see that it is working as indicated with "clipped intervals repaired". If it does nothing, then you can skip this part

Removing DC Offset
Before starting the process for separation, make sure that the audio has zero DC offset to prevent further issues that would interrupt the processing due to the bottom line noise. The waveform statistics is under the Window tab in RX11.

This can be done in audacity by going to the Effect tab > Volume and Compression > Normalize then check the box to remove the DC offset

If you prefer to EQ in RX 11, then click on the EQ module and enable only the hp bell curve. Keep the frequency precision to 6 and the frequency at 30-32hz. Your DC offset will be at 0% if you've done it correctly.

heres a small comparison with the changes after vocal separation
Without DC offset:

With DC offset:

Best Quality Separator
As of today, the best quality separator for music and SFX noises is the ZFTurbo's finetuned BS Roformer, an exclusive model from MVSEP. It'll require an account to reduce the queues. You only need to do one pass of this. Keep the audio under 10 minutes or split it into sections in Audacity as you cannot exceed 100mb

What if there isn't music in my dataset?
You can still use BS Roformer to get rid of static and SFX noises
Is there a BS Roformer equivalent on UVR?
There is BS Roformer-Viper-X 1296 and 1297. Either one of these models could be used
Some notable mentions:
MDX23C is an option if you feel like BS Roformer is damaging your dataset by being too aggressive, often muddling parts of your audio

Bandit V2 isolates speech, music, and SFX and may be situationally useful for particular audios with tv shows/movies

If Bandit V2 isn't removing sfx noises, then combine it with the Melband Karaoke model using the "Mixture" model type. It's meant for removing back and leading vocals

Reverb Removal (noreverb) can isolate the vocals from audio especially with songs that have strong orchestral instrumentals. You need to use the "Use as is" preprocess after you extracted the vocals. De-echo may not be needed afterwards

Dereverbing and De-echo The Audio
While keeping in mind of doing the least processing, you want to keep the audio as natural as possible for RVC, or Hifigan. Hifigan is the generative adversarial network that makes up our discriminator and generator for cloning sounds and training stability. Having audio that has been damaged or reconstructed will affect the generalization of the graphs to fully replicate the clarity and accent of the voice.
Reverb is multiple sources of sound returning and echo is the delay. It is important to remove these from the dataset otherwise it'll cause your model to have artifacts as Hifigan cannot replicate the model's clarity.
Best Model for Dereverb And De-echo
The current best Dereverb plugin is the Clarity VX DeReverb Pro module, another paid software that you can get for free. The aggressiveness can be tweaked or finetuned to your liking as it cuts into the audio and does not reconstruct the frequencies. Clarity VX cannot de-echo the audio so you need to use UVR De-echo or RX Dialogue Isolate

Audio damage
Any use of the De-echo model with UVR will slightly damage your audio with a 17khz cutoff frequency on the spectrogram
If you don't want to use ClarityVX, the most common method is to use UVR Dereverb and De-echo separately as you have full control on whats needed for your audio. There is no predetermined settings as each audio is different. The rule of thumb is to use an aggression of 3.0 -5.0 and nothing more than that. If the audio does not have reverb or echo, do not use any of these models as it can muffle the audio
If you only rely on MVSEP, you're forced to use UVR-DeEcho-Dereverb as there is no standalone option for the dereverb model. The cutoff frequency for this separation model would be 17.5khz

heres what audio with mono reverb will look like on Izotope RX11

and the result of DeEcho-Dereverb at 0.5 aggression:

There may be leftover reverb or echo that weren't removed so that'll be addressed in the RX Dereverb module later in the Manual Denoising section. I will also troubleshoot the audio increasing in volume after dereverb and deecho in the FAQ Regarding Normalization and Compression section
RX11 Modules
Spectral Denoising The Audio
Izotope's Spectral Denoise provides natural noise reduction and will preserve the quality of your audio as it minimizes artifacts. It analyzes the signals of noise that we select and modifies the frequency components. Essentially, UVR Denoise is not needed afterwards since the cleaning has been processed in spectral. The rest of the the cleanup is done through our manual denoising via RX11.
Here is the settings that were used in the previous guide, which is mostly fine if you can't recognize patterns in a noise profile. Artifact control, whitening, Release [ms], Smoothing, and Reduction could be adjusted based on particular datasets. Again, don't fix it if it aint broke

You only need to do one or two passes of spectral denoising. Doing further processing than that will compress, or degrade your audio. Be cautious of overdoing it with the noise profile (selecting breathing or speech by accident) as RX might take away details and important aspects of a person's voice.
Wouldn't this take up too much time?
If your dataset is too long for spectral denoising, I suggest splitting it into sections so it is more manageable. It won't mess up with the overall noise profile of the whole dataset if you do so. You're prone to make mistakes/misclicks when selecting audio, especially when the dataset is 20 minutes to an hour long
What if I didn't capture the entire profile?
Some noises may, or may not stay in tact even after the second pass with Spectral Denoise. RX will only pick out each respective noise samples to the audio that has been selected so it's better that you capture it in full
this is what the audio looks like before spectral denoising

Now we select the noise (click and hold shift after selecting an area to include multiple audios) then press learn in the Spectral Denoise module after we captured the entire noise profile
Unselect the audio and click render

now in this case one pass of spectral denoise wasn't enough. Repeat the steps done in the first pass by selecting the areas with the blue noise.

The 2nd pass will remove the noise

FAQ Regarding Normalization and Compression
Why does my audio sounds like it's clipping or distorted? Should I use the gain tool in RX?
Audios will usually have crackling and clicking noises introduced if it's over 1.0+db. We don't want to use the gain tool to address this since it's a compressor. If it doesn't have any of those issues, then leave the dialogue alone to maintain its natural range

Do not use any form of compression on speech as it'll squash the dynamics and introduce artificial tearing to your model. Again, try to maintain the natural dynamic range if possible. If you must decrease the volume on a particular dialogue because its too loud for your ears and you still need to use the RX Dereverb module, consider normalizing between -2db or -3db. The use of the RX Dereverb will put it back to normal volume.
When should I normalize the whole dataset?
It is optional to use this module as it can be argued that rvc will do the normalization for you with -2db. You can normalize the dataset when it has been thoroughly cleaned at the end, if you want.

Modules overview
De-ess
This tool is used so that the -ess /fff/z/ch sounds, or sibilances, are less harsh/robotic when the voice model tries to pronounce certain words. Only use this on the actual sibilances and not the entire dataset/dialogue. Automatic de-ssing with Ctrl + A can select the wrong consonant sounds or skip audios that needs more de-essing so keep that in mind. Adjust spectral shaping as needed if you know what you're doing

De-crackle
Only use this tool if you hear crackling noises in specific parts of your dialogue/speech. It's not a requirement to use it

Mouth De-clicking and De-click
Only use mouth de-clicking when clicking noises are audible. It's a good practice to use mouth de-clicking on only the click and not the entire dialogue/audio. Adjust the sensitivity or frequency skew as needed, but do not go overboard as it can remove the finer details of our audio
- This module is specifically tailored to address mouth noise issues in vocal recordings. Mouth noises are typically caused by saliva, lip smacks, tongue clicks, or other oral sounds that can be distracting or unpleasant to listen to in vocal recordings. Mouth de-click module preserves the integrity and naturalness of the vocal performance while reducing these types of mouth noises

We run the de-click module only as a last resort when mouth de-click doesn't work
Using both modules together may strip away the "k" consonants of our model

- This module is designed to remove or reduce short impulse noises such as clicks, pops, and digital clipping artifacts from audio recordings. These noises can occur due to various reasons, including imperfections in the recording equipment, electrical interference, or flaws in the audio signal itself. The De-click module analyzes the audio waveform and identifies these short, transient noises, then applies processing algorithms to smooth out or remove them, restoring the audio to a cleaner state
Dialogue Isolate
Use this tool when you have audible room echo that could be removed on specific parts of your speech. Do not use it for the entire dataset because it may be inaccurate and strip away details. Or sometimes it doesn't work. Keep the settings the same here including sensitivity

De-plosive
Use Deplosives when there are audible thumps of air coming through the mouth. Again, -plosives are consonant sounds that needs attention. Specifically the P, T, K, and CH sounds. There are no right settings for this so adjust it until the roughness of the -plosives are gone

Plosives look like this. Do not select the whole speech and only the plosives as suggested in the red lines

De-hum
Use De-humming to take care of low or high frequency hums. There are no consistent settings for this as each situation is different for your audio
- Sensitivity will adjust the amount of hum that will be removed
- Bands, or notch filters will increase depending on the complexity of the noise
- Filter Q is the range selector

For example, use the frequency selector tool, select the humming occurring below 100hz, then press learn and render


The red underline shows what you should be looking for

EQ
This has already been covered in the section for removing the DC offset. Do this if you haven't done it already. It takes care of low-end noise, but if your dc offset is already at 0% then skip this module
Manual Denoising
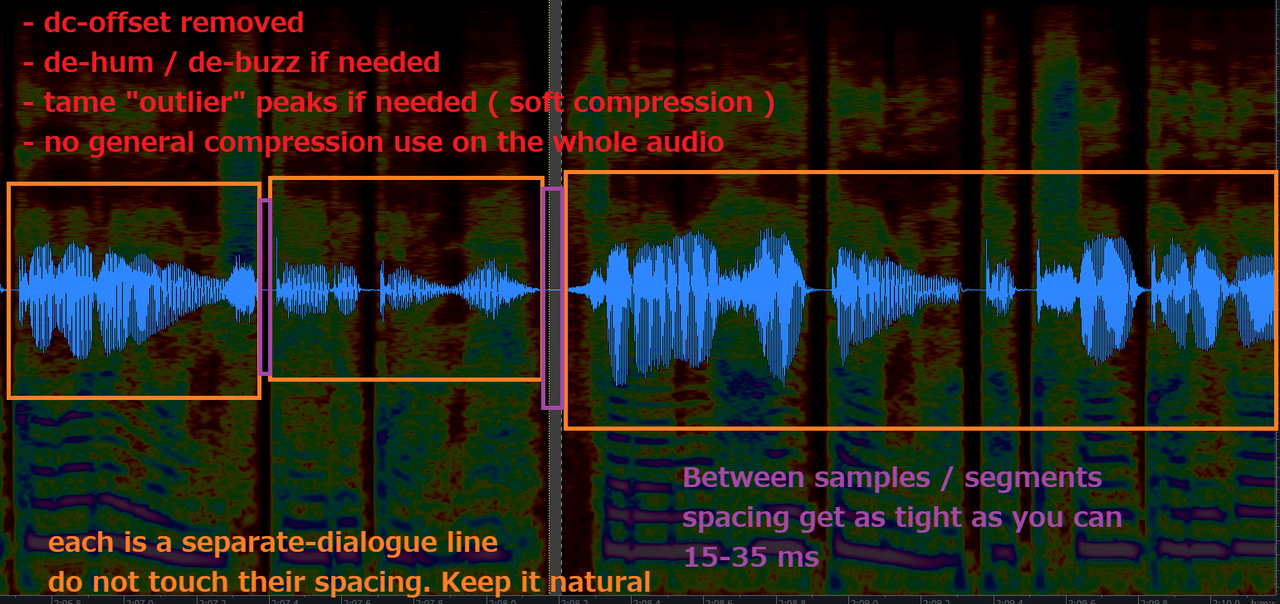
You should have noticed that RX11 moves the audio closer to each other whenever you delete a space or speech. Use the Lasso or Brush tool to delete dialogue precisely, which should preserve the spacing in phonetics. Make sure it does not cause clipping on the waveform as it'll look like a sharp spike. You can also clean up the leftover residuals left behind by spectral denoising.
Audios with thumping, SFX sounds, ringing noises, and weird vocalizations or breaths that might affect the voice model should be removed from the dataset as it'll have those characteristics. You can try to lasso out the possible source of the noise, but keep the audio as natural as possible without damaging the frequencies.


The RX Dereverb module will remove reverb that's leftover from the audio and may help remove noises.
With RX Dereverb, select the audio, press learn and render. Adjust the reduction if needed. Do not use a strong reduction as it may muffle the audio. You can always undo with Ctrl + Z.
Refer to the normalization FAQ if the volume is peaking or "introducing noises", which isn't the case at all. Do note that RX Dereverb will raise the volume by 2db each time you use it

When the dataset has been thoroughly cleaned, you can resample the dataset to 32k or 44.1k and export as a WAV 32-bit or Flac 24-bit

Noise Gating and Audio Labeling
Auburn Renegate
https://www.auburnsounds.com/products/Renegate.html
(basically Audacity noisegate but better) the free version will be more than enough

we can open Audacity and run the the dataset through Auburn Renegate
after that convert your dataset to mono since RVC works on mono and not stereo
There are two ways of neatly removing the silences in your dataset called Audio Labeling and Truncate
follow these steps
open the menu for labeling


you will now have it like this

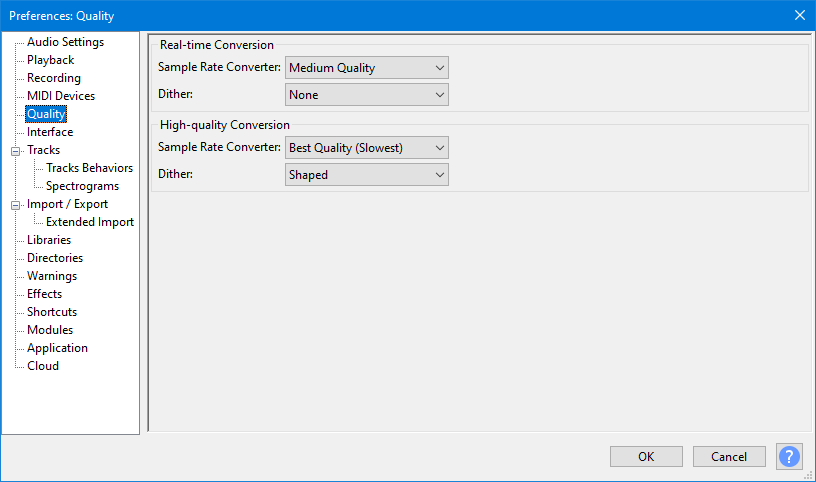
turn off shaped dither with Ctrl + P > Quality since we are exporting with WAV 32-Bit or FLAC 24-bit anyways

now we go to export our audio


the output will be like this

now go in the RVC folder and place all these files in datasets folder. Zip it up if needed
Truncating as a Alternative
Credits go to .codename0 for sharing his method
we are not using Audacity's truncate and instead we are letting rvc do the splitting
Neatly packing it together in Izotope should result in less silences and give more contextual voice data to RVC, however it will be less effective with longer datasets (15+ minutes) where there won't be a difference between this method and audio labeling
