Chromebook Unenrollment Tutorial
This Rentry was made by v3rtual on Discord. Contact me if there are inaccuracies.
None of the images on here are mine. I took them off of Google and various Chromebook exploit servers.
I do not condone the theft of school property. Please do not use this tutorial to unenroll Chromebooks owned by schools (even though I can't do anything to stop you from doing so.)
Note that this tutorial will not work if you do not read it! Please don't be a stupidhead!
Todo:
Write how to clip chip for sharpener
Write All Icarus tutorials
Fix recovery keys
Below is a Table of Contents. Please skip straight to the Unenrolling section unless you want instructions to a specific exploit.
Credits:
SH1mmer - Mercury Workshop
CryptoSmite - Writable
BadRecovery (formerly OlyBmmer) - OlyB/binbashbanana
Pencil Method - Coolelectronics
BR1CK - Copernicium
Icarus - Writable
Icarus Lite - Cosmic
BadApple - Applefritter Inc.
Pencil Sharpener - truekas
Unenrolling
Hello! This Rentry serves as a tutorial on how to unenroll your Chromebook.
To get started, Turn on your Chromebook, do not login, and press Alt + V. Your ChromeOS version should be in the Top Right of the screen.
If on ChromeOS version 101 or lower, click here.
If on ChromeOS version 102 or higher, click here.
If you have any issues unenrolling, Please join the MercuryWorkshop Support Server.

101 or Lower
Log Into Your Chromebook.
Open Google Chrome and Hit the ctrl key, the alt key, and the T key at the same time to enter crosh.
If crosh is blocked, or you cannot log into your Chromebook, click here.
Type the following into crosh:
set_cellular_ppp \';dbus-send${IFS}--system${IFS}--print-reply${IFS}--dest=org.chromium.SessionManager${IFS}/org/chromium/SessionManager${IFS}org.chromium.SessionManagerInterface.ClearForcedReEnrollmentVpd;exit;\'
Hit the ctrl key, the alt key, the shift key, and the r key at the same time.
Click Restart and wait for the Chromebook to Reboot.
Click Powerwash, Click Continue, and wait for the Chromebook to reboot.
Congratulations! Your Chromebook is now unenrolled!

102 or Higher
You will need a USB stick, SD card, or microSD card to unenroll your Chromebook.
Hold the esc key, the ⟳ (refresh) key, and the ⏻ (power) key at the same time for 1-3 seconds.
Note that on some Chromebooks, the ⏻ (power) key is replaced with a 🔒 (lock) key. In that case, your ⏻ (power) key is located on the side of your Chromebook.
When you do so, one of the following screens should pop up.
This is called Recovery Mode.
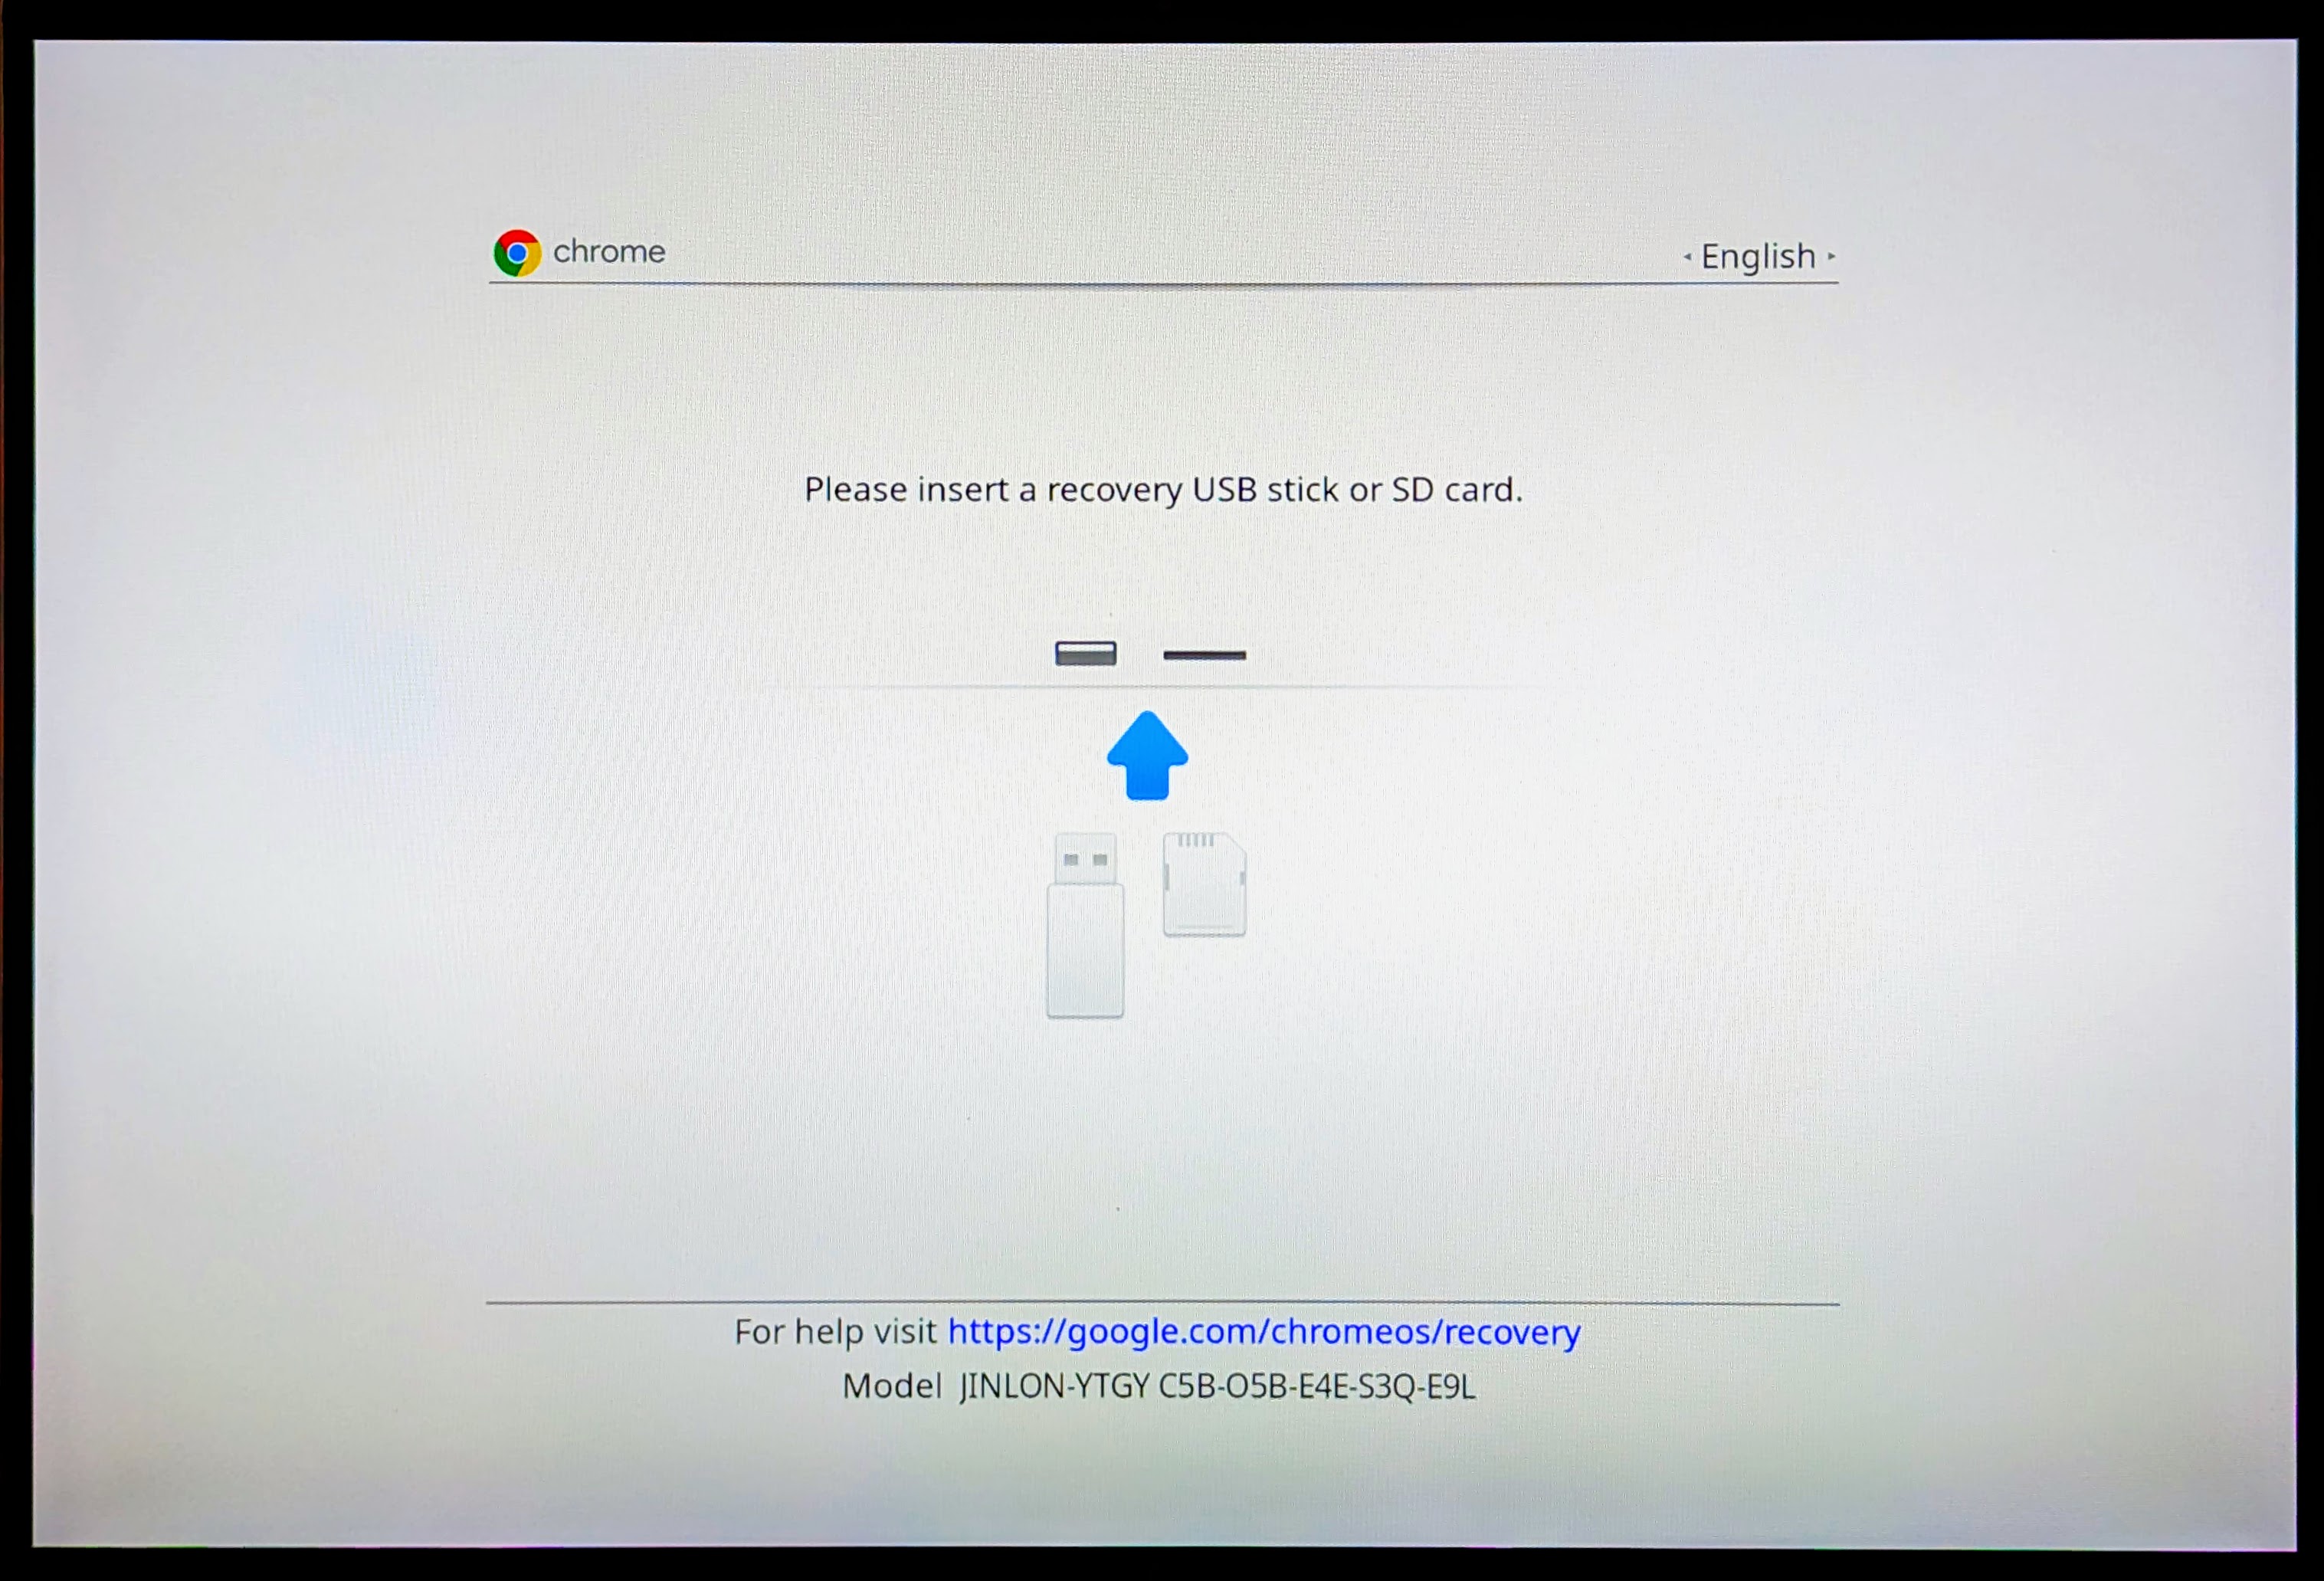
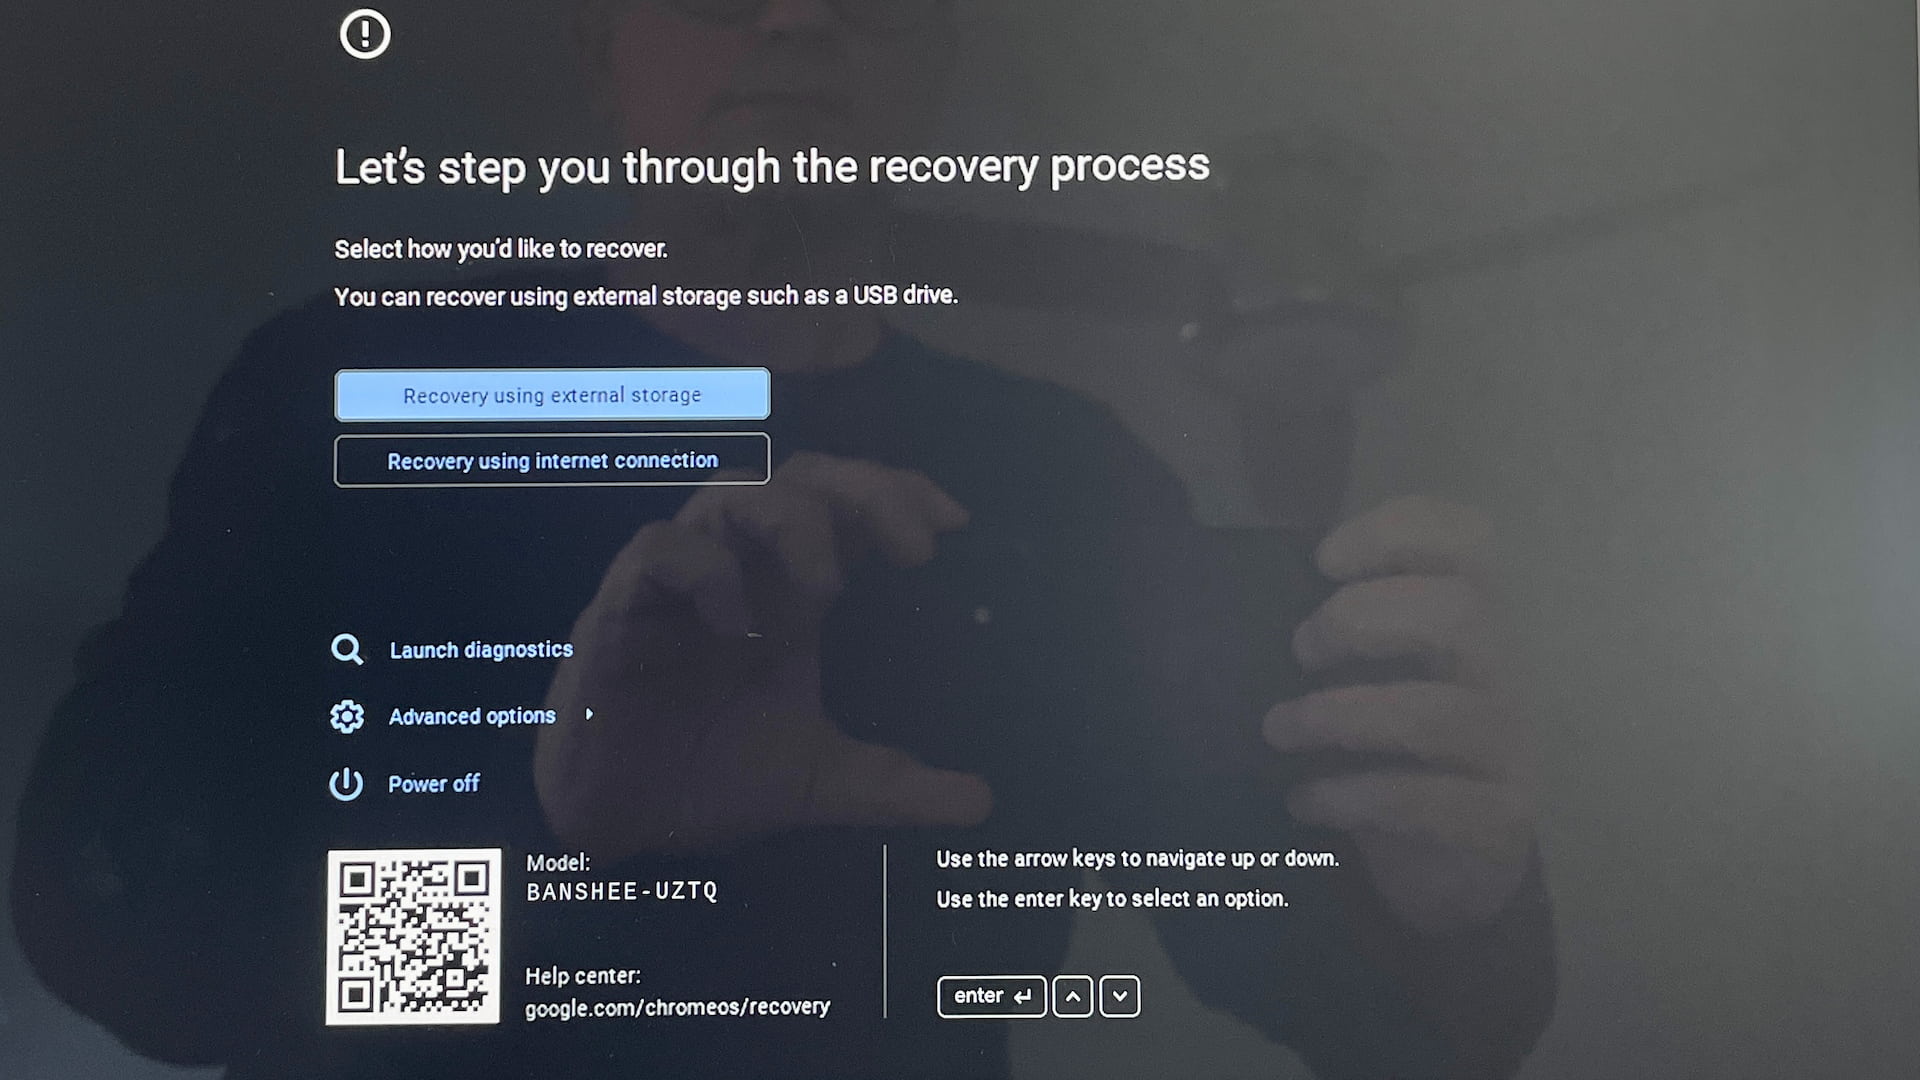
Hit the tab key. The text that popped up is the Debug Info.
Look for a value that looks like "kernver=0x00000000" in the debug info.
If your kernver ends in 0 or 1, click here.
If your kernver ends in 2, click here.
If your kernver ends in 3, click here.
If your kernver ends in 4, click here.
If your kernver ends in 5, click here.

Shim Availability Check 01
At the bottom of the recovery mode screen, there is a text labelled Model. This is the codename of your Chromebook.
Go to cros.tech and type the codename of your Chromebook into the box.
Underneath the name of your Chromebook on cros.tech, there should be a text labelled board. This is the board name of your Chromebook.
Check the following list for your board name.
ambassador, banon, brask, brya, clapper, coral, corsola, cyan, dedede, edgar, elm, enguarde, fizz, glimmer, grunt, hatch, jacuzzi, kalista, kefka, lulu, nami, nissa, octopus, orco, puff, reks, relm, sentry, stout, strongbad, tidus, ultima, volteer, zork
If your board name is in bold, click here.
If your board is on the list, that means that your Chromebook has a Leaked Shim.
If your Chromebook has a leaked shim, click here.
If your Chromebook does not have a leaked shim, click here.

Keyrolled Check 01
In the debug info, look for a text labelled gbb.recovery_key.
If your board is dedede, Check if your gbb.recovery_key matches this: 0839ba3e040eb2f8c9d3d19ee293b735f4c92851
If your board is corsola, Assume that you are not keyrolled. If you can boot into SH1mmer, please contact v3rtual on Discord.
If your board is nissa, Check if your gbb.recovery_key matches this: 7f275e9b2a841aae9a8f2f9f747568d6811ef873
If your gbb.recovery_key DOES NOT MATCH the text for your board, that means that your Chromebook is keyrolled.
If your Chromebook is keyrolled, click here.
If your Chromebook is not keyrolled, click here.

SH1mmer
If you are above ChromeOS version 110, you may need to downgrade to v105! Read the downgrading section.
Firstly, Go to Darkn's Filehost and look for your board name. Download the file named after your board.
Secondly, Go to the Chrome Webstore and get the Chromebook Recovery Utility.
Open the Chromebook Recovery Utility, click the gear at the top-right, and click "Use local image."
Select the file you downloaded from Darkn's Filehost.
Plug your USB drive, SD card, or microSD card into your computer, and then select it from the drop-down menu. Hit Continue.
Hit Create Now and wait until it is complete.
Now, Hold the esc key, the ⟳ (refresh) key, and the ⏻ (power) key at the same time for 1-3 seconds to enter recovery mode.
Note that on some Chromebooks, the ⏻ (power) key is replaced with a 🔒 (lock) key. In that case, your ⏻ (power) key is located on the side of your Chromebook.
Once in recovery mode, Hit the ctrl key and the d key at the same time, and then hit the enter key.
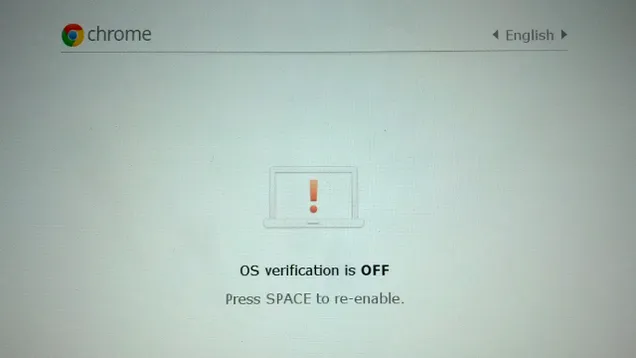
Once you reach a screen that says anything along the lines of "developer mode is enabled," or "OS verification is disabled," Hold the esc key, the ⟳ (refresh) key, and the ⏻ (power) key at the same time for 1-3 seconds again.
It is okay if this screen tells you that Developer Mode Is Blocked! That does not matter!
Once in the Recovery Mode again, Plug your USB drive, SD card, or microSD card into your Chromebook.
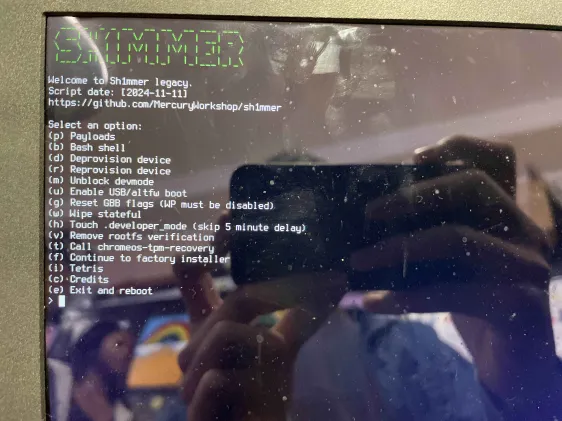
You should now be on a screen that looks like this.
From here, hit the d key, and then hit the enter key.
Once that is done, hit the e key, and then hit the enter key.
You should now be on a screen that looks like one of these:
Either hit space to disable developer mode, or use arrow keys to navigate to "return to secure mode" and hit enter to disable developer mode.
Congratulations! Your Chromebook is now unenrolled!

Shim Availability Check 2
At the bottom of the recovery mode screen, there is a text labelled Model. This is the codename of your Chromebook.
Go to cros.tech and type the codename of your Chromebook into the box.
Underneath the name of your Chromebook on cros.tech, there should be a text labelled board. This is the board name of your Chromebook.
Check the following list for your board name.
ambassador, banon, brask, brya, clapper, coral, corsola, cyan, dedede, edgar, elm, enguarde, fizz, glimmer, grunt, hatch, jacuzzi, kalista, kefka, lulu, nami, nissa, octopus, orco, puff, reks, relm, sentry, stout, strongbad, tidus, ultima, volteer, zork
If your board name is in bold, click here.
If your board is on the list, that means that your Chromebook has a Leaked Shim.
If your Chromebook has a leaked shim, click here.
If your Chromebook does not have a leaked shim, click here.

Keyrolled Check 2
In the debug info, look for a text labelled gbb.recovery_key.
If your board is dedede, Check if your gbb.recovery_key matches this: 37018060a9234607239c05e99edfdce9f5ff5439
If your board is corsola, Assume that you are not keyrolled. If you cannot boot into SH1mmer, please contact v3rtual on Discord.
If your board is nissa, Check if your gbb.recovery_key matches this: a75ef67320422fe73148feb321d723cde
If your gbb.recovery_key matches the text for your board, that means that your Chromebook is keyrolled.
If your Chromebook is keyrolled, click here.
If your Chromebook is not keyrolled, click here.

CryptoSmite
If you are above Chrome OS version 119, You will need to downgrade to v118! Read the downgrading section.
Firstly, Go to Darkn's Filehost and look for your board name. Download the file named after your board.
Secondly, Go to the Chrome Webstore and get the Chromebook Recovery Utility.
Open the Chromebook Recovery Utility, click the gear at the top-right, and click "Use local image."
Select the file you downloaded from Darkn's Filehost.
Plug your USB drive, SD card, or microSD card into your computer, and then select it from the drop-down menu. Hit Continue.
Hit Create Now and wait until it is complete.
Now, Hold the esc key, the ⟳ (refresh) key, and the ⏻ (power).key at the same time for 1-3 seconds to enter recovery mode.
Note that on some Chromebooks, the ⏻ (power) key is replaced with a 🔒 (lock) key. In that case, your ⏻ (power) key is located on the side of your Chromebook.
Once in recovery mode, Hit the ctrl key and the d key at the same time, and then hit the enter key.
Once you reach a screen that says anything along the lines of "developer mode is enabled," or "OS verification is disabled," Hold the esc key, the ⟳ (refresh) key, and the ⏻ (power) key at the same time for 1-3 seconds again.
It is okay if this screen tells you that Developer Mode Is Blocked! That does not matter!
Once in the Recovery Mode again, Plug your USB drive, SD card, or microSD card into your Chromebook.
You should now be on a screen that looks like this.
From here, hit the p key, and then hit the enter key.
Once that is done, use the arrow keys to navigate to "Cryptosmite (unenrollment up to r119, by writable), and then hit the enter key.
After that, hit the y key, and then hit the enter key.
Your Chromebook will reboot.
DO NOT CONTINUE ALL THE WAY THROUGH SETUP!
Once you see a screen that looks like the following, hit the ctrl key, the alt key, the shift key, and the r key all at the same time.
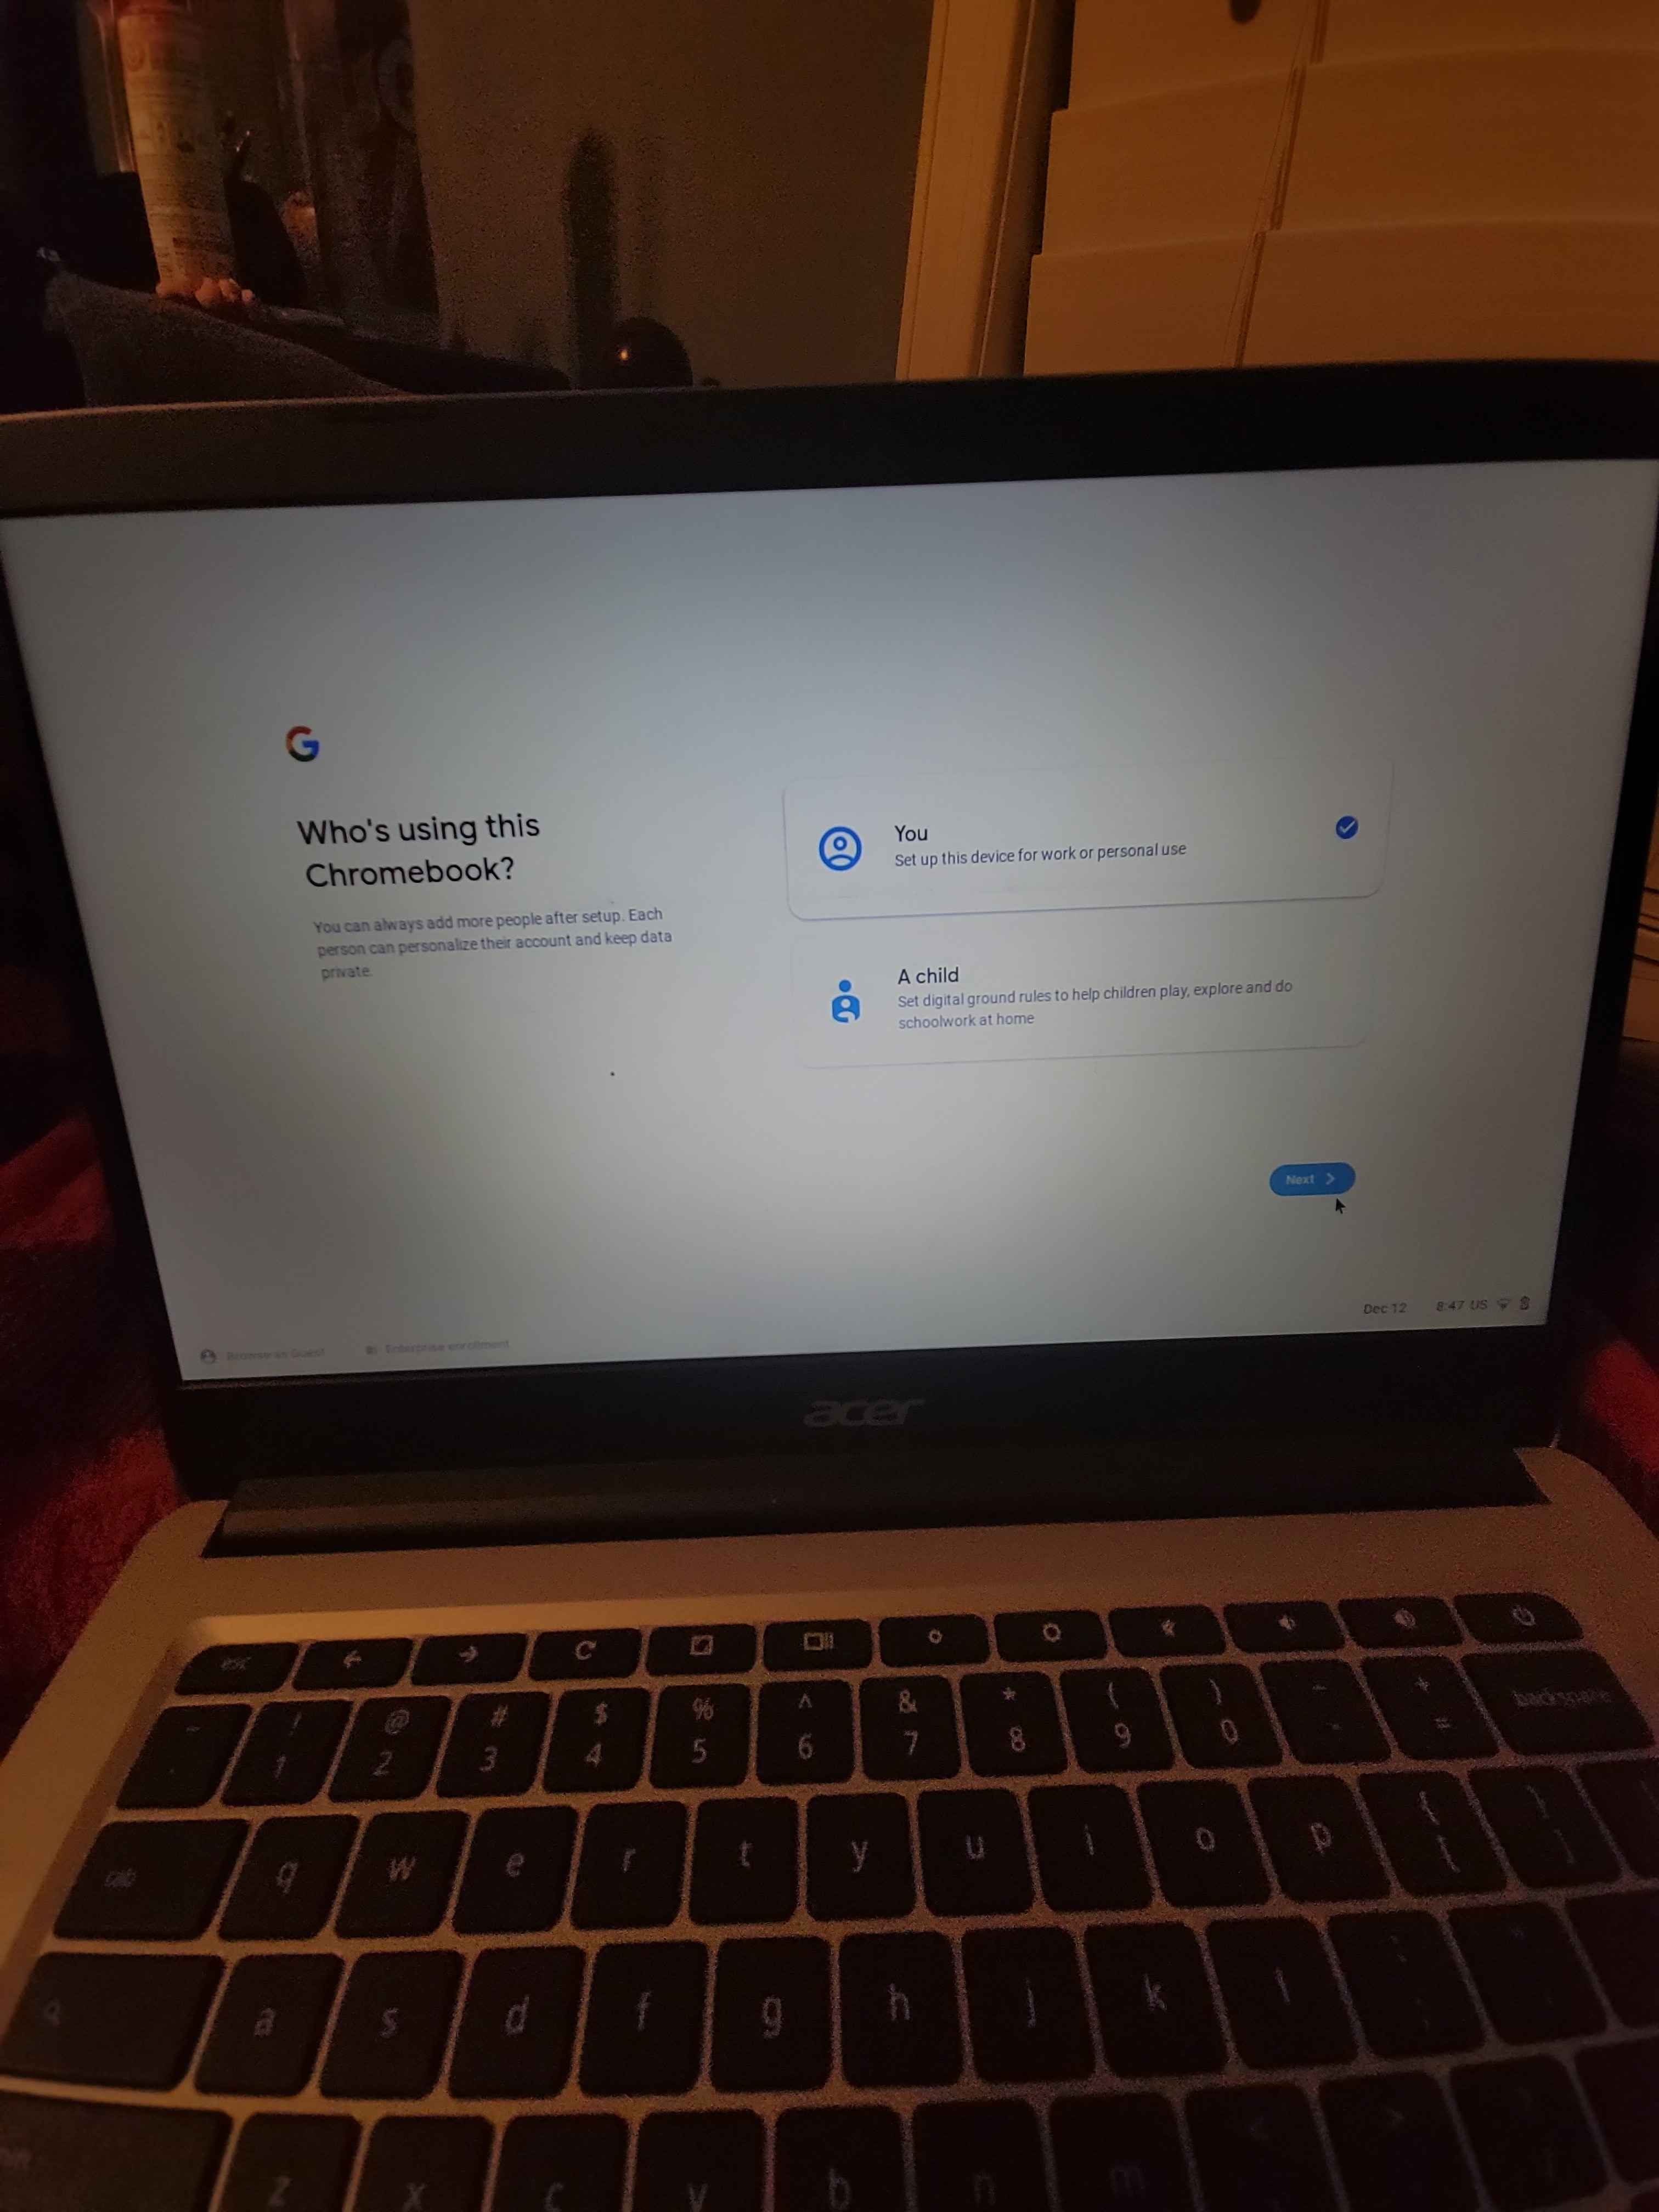
Then, Click "Powerwash" and then "Continue."
Your Chromebook will then reboot.
Congratulations! Your Chromebook is now unenrolled!

BadRecovery (Formerly OlyBmmer)
If you are above ChromeOS version 124, you will need to downgrade to v121! Read the downgrading section.
Firstly, Go to Darkn's Filehost and look for a file in either of the folders named after your board (or codename.)
Tip: Most Chromebooks in use by schools today are going to be located in the postinst folder.
If you cannot find your Chromebook's board name (or codename if it does not have a board name) in either of the folders, please join the MercuryWorkshop Support Server.
Secondly, Go to the Chrome Webstore and get the Chromebook Recovery Utility.
Open the Chromebook Recovery Utility, click the gear at the top-right, and click "Use local image."
Select the file you downloaded from Darkn's Filehost.
Plug your USB drive, SD card, or microSD card into your computer, and then select it from the drop-down menu. Hit Continue.
Hit Create Now and wait until it is complete.
Now, Hold the esc key, the ⟳ (refresh) key, and the ⏻ (power) key at the same time for 1-3 seconds to enter recovery mode.
Note that on some Chromebooks, the ⏻ (power) key is replaced with a 🔒 (lock) key. In that case, your ⏻ (power) key is located on the side of your Chromebook.
Only follow the instructions in cyan if you downloaded your file from the unverified folder.
Once in recovery mode, Hit the ctrl key and the D key at the same time, and then hit the enter key.
Once you reach a screen that says anything along the lines of "developer mode is enabled," or "OS verification is disabled," Hold the esc key, the ⟳ (refresh) key, and the ⏻ (power) key at the same time for 1-3 seconds again.
It is okay if this screen tells you that Developer Mode Is Blocked! That does not matter!
Once on the Recovery Mode screen, Plug your USB drive, SD card, or microSD card into your Chromebook.
Wait for a screen like the following to pop up:
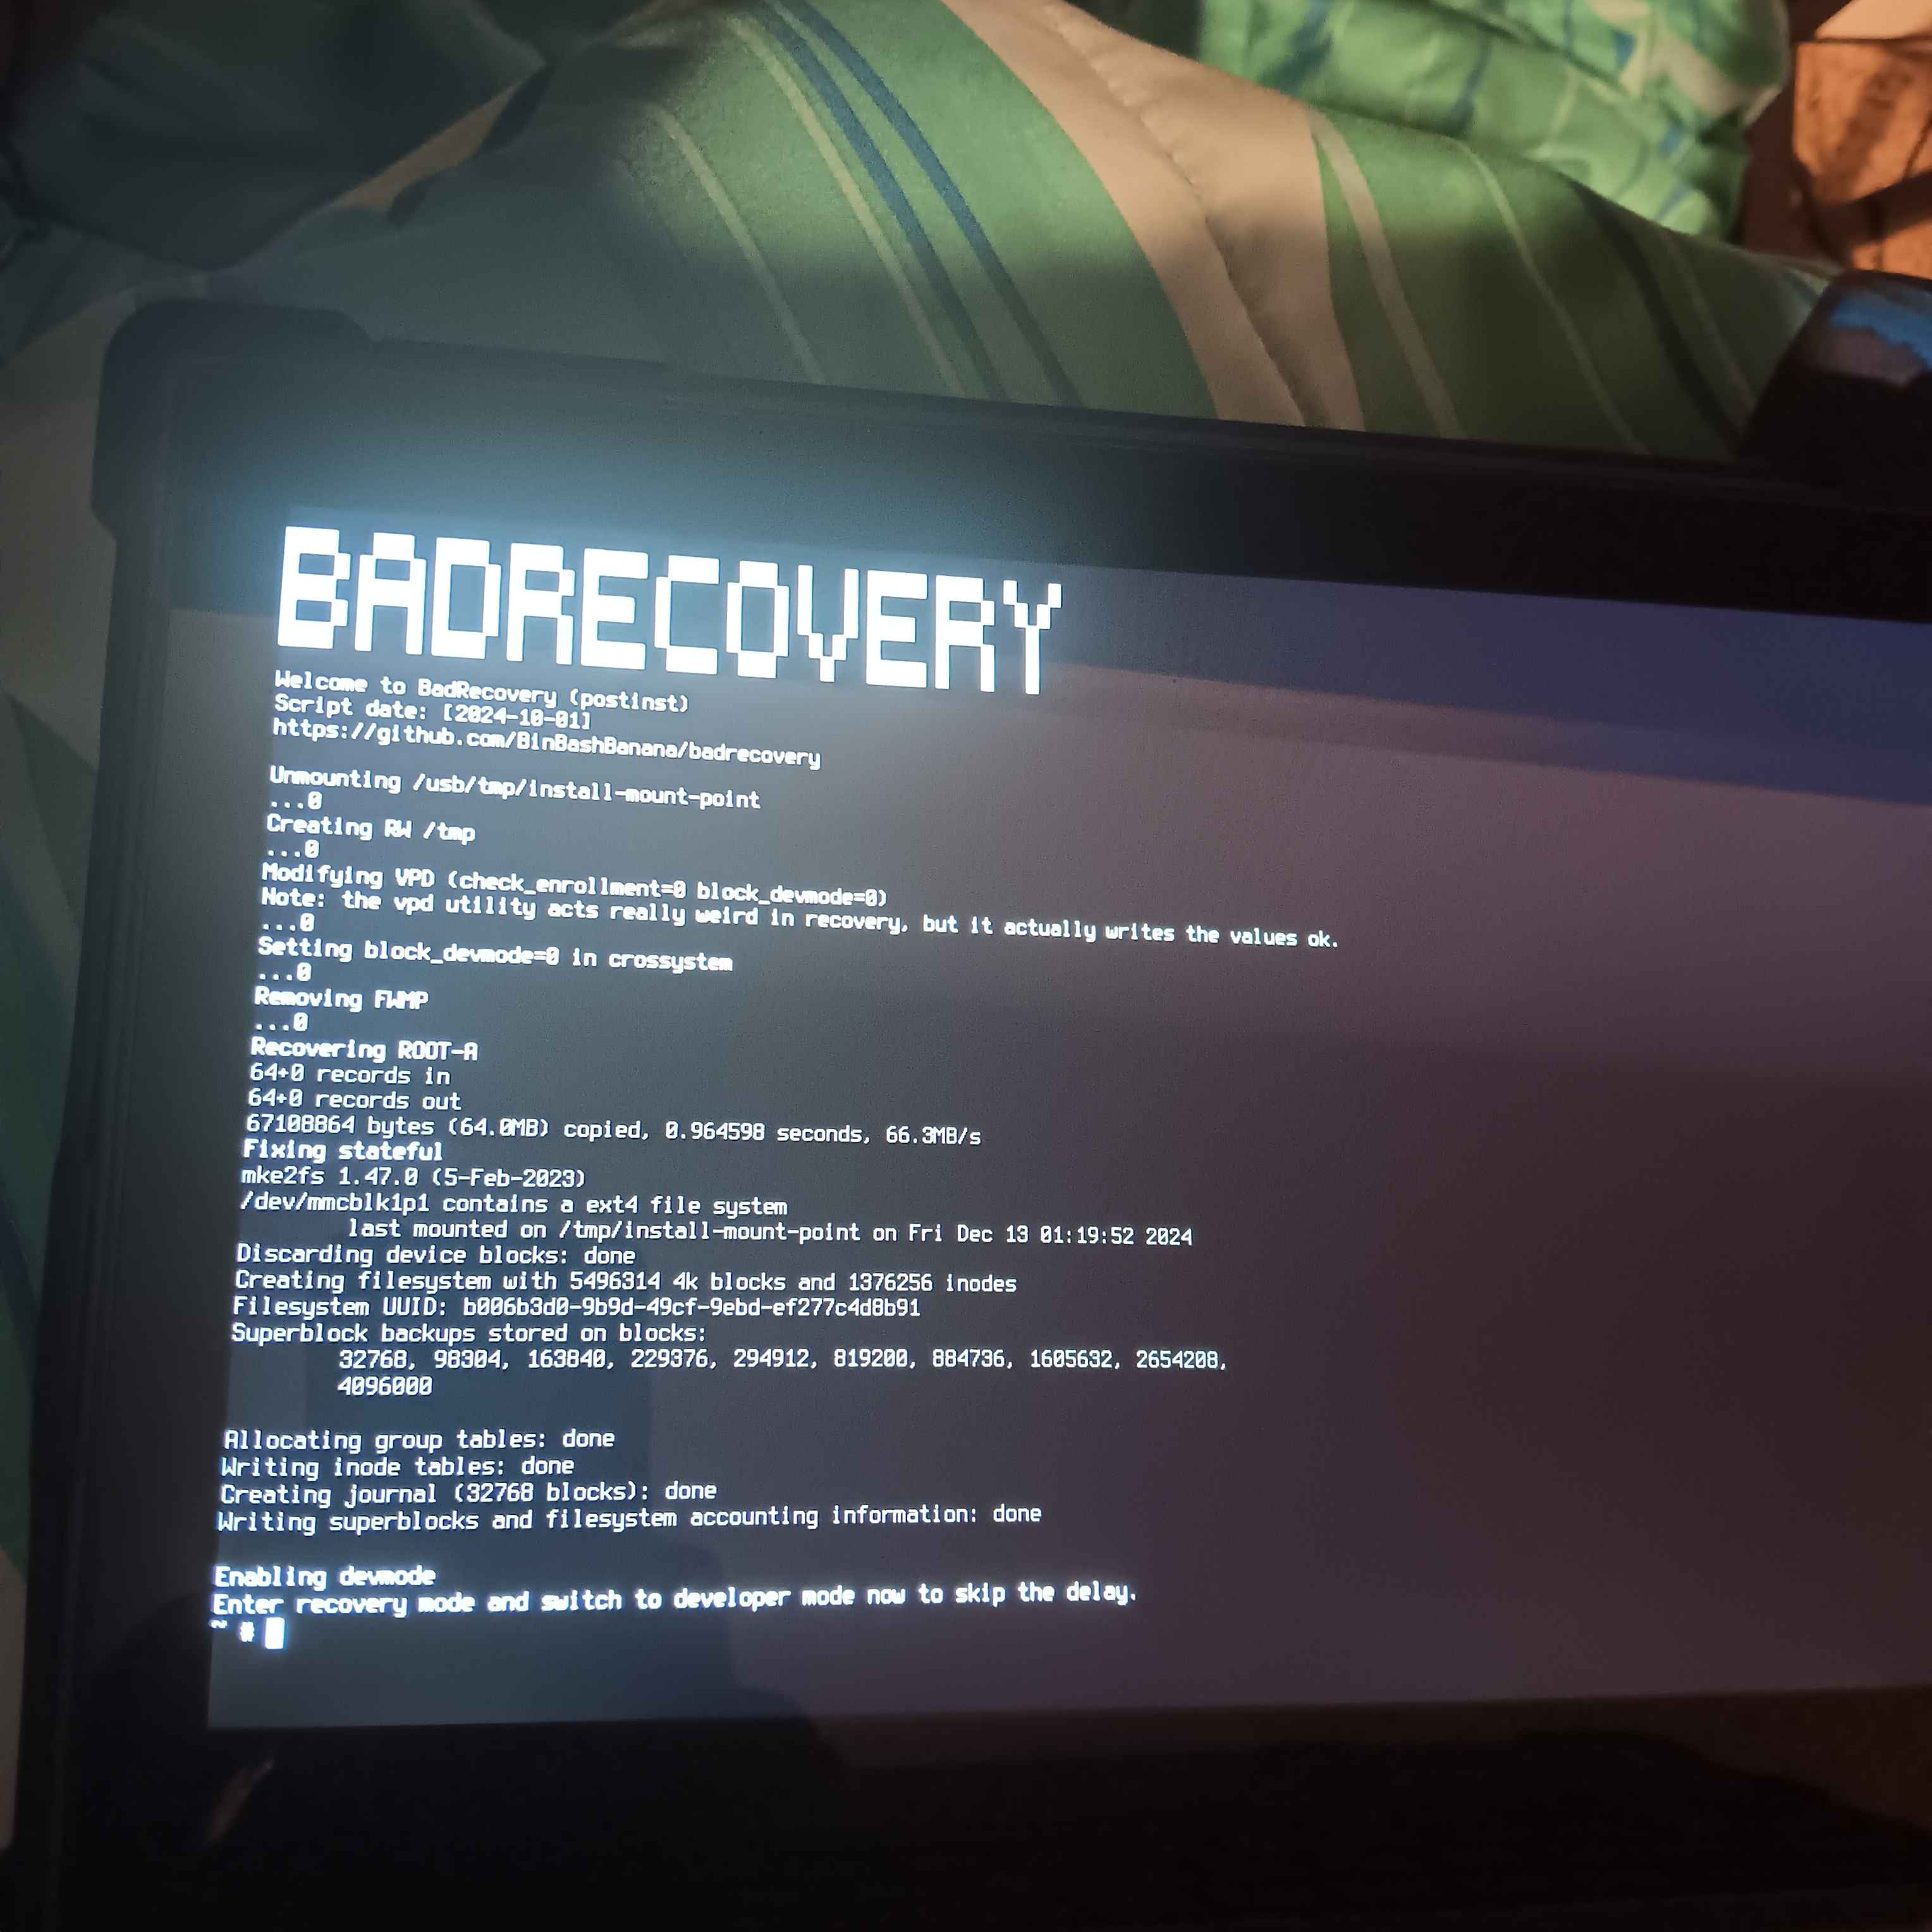
When it tells you to enter recovery mode and switch to developer mode, hit the ⟳ (refresh) key and the ⏻ (power) key at the same time.
Your Chromebook will reboot.
Congratulations! Your Chromebook is now unenrolled!
Be Careful! After unenrolling with BadRecovery (formerly OlyBmmer) your Chromebook may re-enroll itself if you update it to kernver 4 or above, and then powerwash it! It is strongly reccomended that you Disable WP so that you can unenroll easily if this happens to you.

Shim Availability Check 4
At the bottom of the recovery mode screen, there is a text labelled Model. This is the codename of your Chromebook.
Go to cros.tech and type the codename of your Chromebook into the box.
Underneath the name of your Chromebook on cros.tech, there should be a text labelled board. This is the board name of your Chromebook.
Check the following list for your board name.
ambassador, banon, clapper, coral, cyan, dedede, edgar, elm, enguarde, fizz, glimmer, grunt, hatch, jacuzzi, kalista, kefka, lulu, nami, octopus, orco, puff, relm, sentry, stout, strongbad, tidus, ultima, volteer, zork
If your board name is in bold, click here.
If your board is on the list, that means that your Chromebook has a Leaked Shim.
If your Chromebook has a leaked shim, click here.
If your Chromebook does not have a leaked shim, click here.

Keyrolled Check 4
In the debug info, look for a text labelled gbb.recovery_key.
**Check if your gbb.recovery_key matches this: 37018060a9234607239c05e99edfdce9f5ff5439
If your gbb.recovery_key matches the text, that means that your Chromebook is keyrolled.
If your Chromebook is keyrolled, click here.
If your Chromebook is not keyrolled, click here.

Ti50 Check 4
Firsly, Read the following list, and see if it contains your codename or board.
brya, brask, cherry, guybrush, skyrim, rex, nissa, corsola, staryu, geralt
If your board or codename is not on here, you do not have a Ti50 chip.
If your Chromebook does not have a Ti50 chip, click here.
If your board or codename is on the list, continue reading.
Go to Darkn's Filehost and look for your board name. Download the file named after your board.
Secondly, Go to the Chrome Webstore and get the Chromebook Recovery Utility.
Open the Chromebook Recovery Utility, click the gear at the top-right, and click "Use local image."
Select the file you downloaded from Darkn's Filehost.
Plug your USB drive, SD card, or microSD card into your computer, and then select it from the drop-down menu. Hit Continue.
Hit Create Now and wait until it is complete.
Now, Hold the esc key, the ⟳ (refresh) key, and the ⏻ (power) key at the same time for 1-3 seconds to enter recovery mode.
Note that on some Chromebooks, the ⏻ (power) key is replaced with a 🔒 (lock) key. In that case, your ⏻ (power) key is located on the side of your Chromebook.
Once in recovery mode, Hit the ctrl key and the d key at the same time, and then hit the enter key.
Once you reach a screen that says anything along the lines of "developer mode is enabled," or "OS verification is disabled," Hold the esc key, the ⟳ (refresh) key, and the ⏻ (power) key at the same time for 1-3 seconds again.
It is okay if this screen tells you that Developer Mode Is Blocked! That does not matter!
Once in the Recovery Mode again, Plug your USB drive, SD card, or microSD card into your Chromebook.
You should now be on a screen that looks like this.
From here, hit the b key, and then hit the enter key.
Type in the following command: gsctool -a -I | grep AllowUnverifiedRo and hit the enter key.
If this command does not output anything, or throws an error, your Chromebook does not have a Ti50 chip.
If your Chromebook has a Ti50 chip, click here.
If your Chromebook does not have a Ti50 chip, click here.

Computer Check
The sole purpose of this section is to ask if you have access to a computer that runs Windows, MacOS, or Linux.
If you have access to a computer that runs Windows, MacOS, or Linux, click here.
If you do not have access to a computer that runs Windows, MacOS, or Linux, click here.

Network Logs Check
Log Into Your Chromebook.
Open Google Chrome and go to chrome://network#logs.
If chrome://network#logs is not blocked, click here.
If chrome://network#logs is blocked, or you cannot access it for any other reason, click here.

BR1CK By Copernicium
Firstly, Go to Darkn's Filehost and look for your board name. Download the file named after your board.
Secondly, Go to the Chrome Webstore and get the Chromebook Recovery Utility.
Open the Chromebook Recovery Utility, click the gear at the top-right, and click "Use local image."
Select the file you downloaded from Darkn's Filehost.
Plug your USB drive, SD card, or microSD card into your computer, and then select it from the drop-down menu. Hit Continue.
Hit Create Now and wait until it is complete.
Now, hold the esc key, the ⟳ (refresh) key, and the ⏻ (power) key at the same time for 1-3 seconds to enter recovery mode.
Note that on some Chromebooks, the ⏻ (power) key is replaced with a 🔒 (lock) key. In that case, your ⏻ (power) key is located on the side of your Chromebook.
Once in recovery mode, Hit the ctrl key and the d key at the same time, and then hit the enter key.
Once you reach a screen that says anything along the lines of "developer mode is enabled," or "OS verification is disabled," Turn developer mode back off (or re-enable OS verification.)
Go through setup and log into your Chromebook.
Open Google Chrome and go to chrome://network#logs.
Under the options section, check all of the boxes.
Click the button that says "Store System Logs" right under the boxes.
Wait for the page to tell you "Logs successfully written to Downloads directory."
Once it tells you that, Go to this Reset Times Calculator, and Upload the file named "combined_logs" that's in your Downloads folder to the box.
Write down the numbers it gives you. You will need these very soon.
If it tells you "could not parse for show enrollment screen," try again from the start of this section.
Turn off your Chromebook.
Turn it back on, then hit the ctrl key, the alt key, the shift key, and the r key all at the same time to Powerwash your Chromebook.
Then, Click "Powerwash" and then "Continue."
At this point, Get a Stopwatch ready. You're going to need precision here.
Continue through Chromebook setup. The moment you see "Enterprise enrollment," Start your stopwatch.
Press the ⟳ (refresh) key, and the ⏻ (power) key at the same time when your stopwatch is within the time range you wrote down.
If you see a screen that looks like one of the following after your Chromebook turns back on, you did this successfully.

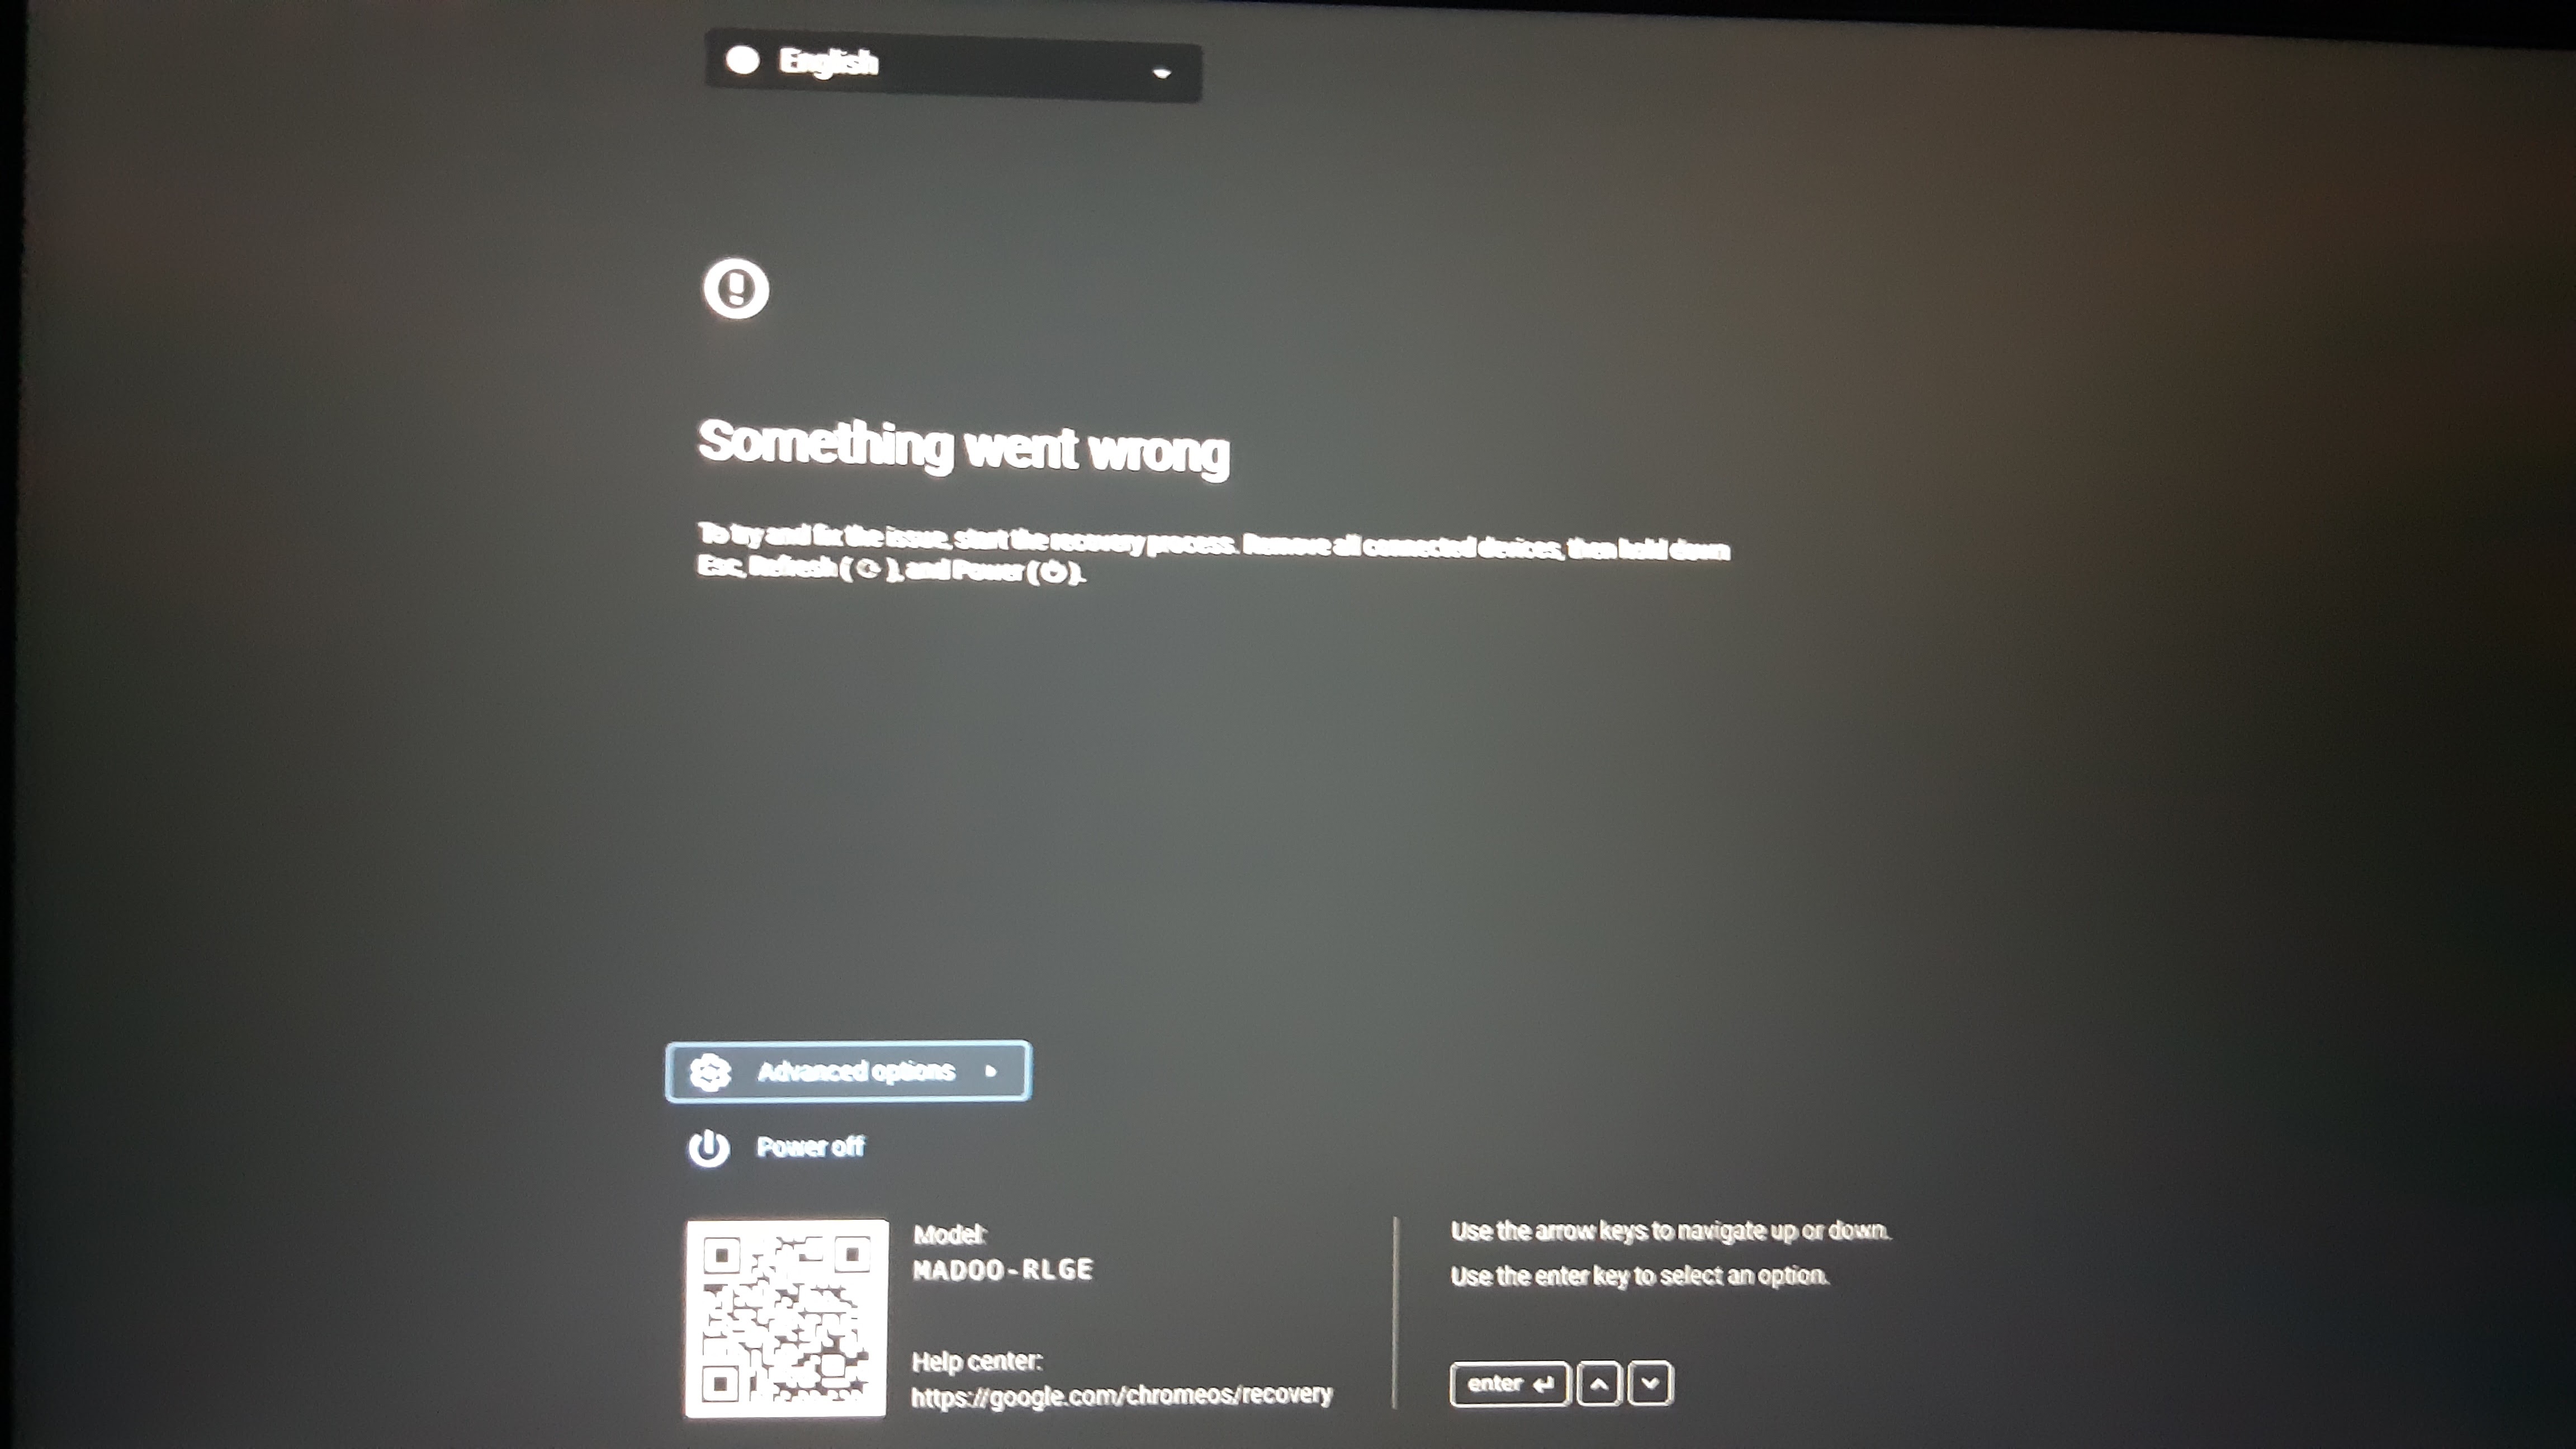
If you do not see a screen like one of these, try again from the start of this section.
Now, Hold the esc key, the ⟳ (refresh) key, and the ⏻ (power) key at the same time for 1-3 seconds to enter recovery mode.
Note that on some Chromebooks, the ⏻ (power) key is replaced with a 🔒 (lock) key. In that case, your ⏻ (power) key is located on the side of your Chromebook.
Once in recovery mode, Hit the ctrl key and the d key at the same time, and then hit the enter key.
Once you reach a screen that says anything along the lines of "ChromeOS is Missing or Damaged," or "Something Went Wrong" again, Hold the esc key, the ⟳ (refresh) key, and the ⏻ (power) key at the same time for 1-3 seconds again.
Once in the Recovery Mode again, Plug your USB drive, SD card, or microSD card containing SH1mmer into your Chromebook.
You should now be on a screen that looks like this.
From here, hit the d key, and then hit the enter key.
Thenn, hit the b key, and then hit the enter key.
Type in the following command: gsctool -a -o and hit the enter key.
If running this command does nothing at all, Type in the following command: gsctool -a -k and hit the enter key. Then, type in gsctool -a -o again, and hit the enter key.
When it says "Press PP button now!", press the power button of your Chromebook. Whenever it says "Another press will be required" it is telling you to wait, and you may have to wait a while. Have patience, and be alert.
After you do that, Your Chromebook will reboot. Do not proceed with setup. Instead, Hold the esc key, the ⟳ (refresh) key, and the ⏻ (power) key at the same time for 1-3 seconds to enter recovery mode.
Note that on some Chromebooks, the ⏻ (power) key is replaced with a 🔒 (lock) key. In that case, your ⏻ (power) key is located on the side of your Chromebook.
Once in recovery mode, Hit the ctrl key and the d key at the same time, and then hit the enter key.
If your screen says "OS Verification is OFF," Hit the ctrl key and the d key at the same time.
If your screen says "Developer mode is enabled, hit the enter key.
Your Chromebook will then take five or so minutes to transition into developer mode.
Continue through Chromebook setup. When you see "Enterprise enrollment," Hold the esc key, the ⟳ (refresh) key, and the ⏻ (power) key at the same time for 1-3 seconds to enter recovery mode.
Plug your USB drive, SD card, or microSD card into your Chromebook.
You should now be on a screen that looks like this.
From here, hit the d key, and then hit the enter key.
Once that is done, hit the e key, and then hit the enter key.
Your Chromebook will reboot in developer mode. Continue through setup in developer mode.
Congratulations! Your Chromebook is now unenrolled!

Icarus
Firstly, Go to Darkn's Filehost and look for your board name. Download the file named after your board.
Secondly, Go to the Chrome Webstore and get the Chromebook Recovery Utility.
Open the Chromebook Recovery Utility, click the gear at the top-right, and click "Use local image."
Select the file you downloaded from Darkn's Filehost.
Plug your USB drive, SD card, or microSD card into your computer, and then select it from the drop-down menu. Hit Continue.
Hit Create Now and wait until it is complete.
If you are using Windows, go to this link and download the executable listed in the latest release of Icarus Lite.
Alternatively, if you are using Linux/Mac, go to the instructions on the Icarus Lite repository for how to run Icarus Lite from its source. Return here after step 5.
After doing this, a window should pop up. It may say, "Icarus Lite is not set up in the local directory. Do you want to automatically set up? (Y/N)." If it does, Type Y and hit the enter key.
After this, it will give you certificate options. Type 1 and hit the enter key.
After this, it may tell you, "Certificates are invalid and Icarus Lite will not work as expected. Do you want to build new certificates? (Y/N)" If it does, Type Y and hit the enter key.

Public Icarus
Using a public Icarus server is an AWFUL IDEA! If I really wanted, I could use it maliciously, install extensions on your Chromebook, spy, use your camera, remote into your device, get your passwords, and more. Of course, I won't do that... Or will I? You just never know. Such is the danger of using a public Icarus server.
WRITE PUBLIC ICARUS

Computer Check BadApple
The sole purpose of this section is to ask if you have access to a computer that runs Windows, MacOS, or Linux.
If you have access to a computer that runs Windows, MacOS, or Linux, click here.
If you do not have access to a computer that runs Windows, MacOS, or Linux, click here.

BadApple Icarus
Firstly, If you are using Windows, go to this link and download the executable listed in the latest release of Icarus Lite.
Alternatively, if you are using Linux/Mac, go to the instructions on the Icarus Lite repository for how to run Icarus Lite from its source. Return here after step 5.
After doing this, a window should pop up. It may say, "Icarus Lite is not set up in the local directory. Do you want to automatically set up? (Y/N)." If it does, Type Y and hit the enter key.
After this, it will give you certificate options. Type 1 and hit the enter key.
After this, it may tell you, "Certificates are invalid and Icarus Lite will not work as expected. Do you want to build new certificates? (Y/N)" If it does, Type Y and hit the enter key.

BadApple Public Icarus
Using a public Icarus server is an AWFUL IDEA! If I really wanted, I could use it maliciously, install extensions on your Chromebook, spy, use your camera, remote into your device, get your passwords, and more. Of course, I won't do that... Or will I? You just never know. Such is the danger of using a public Icarus server.
WRITE BADAPPLE PUBLIC ICARUS

Shim Availability Check 5
At the bottom of the recovery mode screen, there is a text labelled Model. This is the codename of your Chromebook.
Go to cros.tech and type the codename of your Chromebook into the box.
Underneath the name of your Chromebook on cros.tech, there should be a text labelled board. This is the board name of your Chromebook.
Check the following list for your board name.
ambassador, banon, brask, brya, clapper, coral, corsola, cyan, dedede, edgar, elm, enguarde, fizz, glimmer, grunt, hatch, jacuzzi, kalista, kefka, lulu, nami, nissa, octopus, orco, puff, reks, relm, sentry, stout, strongbad, tidus, ultima, volteer, zork
If your board name is in bold, click here.
If your board is on the list, that means that your Chromebook has a Leaked Shim.
If your Chromebook has a leaked shim, click here.
If your Chromebook does not have a leaked shim, click here.

Keyrolled Check 5
In the debug info, look for a text labelled gbb.recovery_key.
If your board is dedede, Check if your gbb.recovery_key matches this: 37018060a9234607239c05e99edfdce9f5ff5439
If your board is corsola, Assume that you are not keyrolled. If you cannot boot into SH1mmer, please contact v3rtual on Discord.
If your board is nissa, Check if your gbb.recovery_key matches this: a75ef67320422fe73148feb321d723cde
If your gbb.recovery_key matches the text for your board, that means that your Chromebook is keyrolled.
If your Chromebook is keyrolled, click here.
If your Chromebook is not keyrolled, click here.

Ti50 Check 5
Firsly, Read the following list, and see if it contains your codename or board.
brya, brask, cherry, guybrush, skyrim, rex, nissa, corsola, staryu, geralt
If your board or codename is not on here, you do not have a Ti50 chip.
If your Chromebook does not have a Ti50 chip, click here.
If your board or codename is on the list, continue reading.
Go to Darkn's Filehost and look for your board name. Download the file named after your board.
Secondly, Go to the Chrome Webstore and get the Chromebook Recovery Utility.
Open the Chromebook Recovery Utility, click the gear at the top-right, and click "Use local image."
Select the file you downloaded from Darkn's Filehost.
Plug your USB drive, SD card, or microSD card into your computer, and then select it from the drop-down menu. Hit Continue.
Hit Create Now and wait until it is complete.
Now, Hold the esc key, the ⟳ (refresh) key, and the ⏻ (power) key at the same time for 1-3 seconds to enter recovery mode.
Note that on some Chromebooks, the ⏻ (power) key is replaced with a 🔒 (lock) key. In that case, your ⏻ (power) key is located on the side of your Chromebook.
Once in recovery mode, Hit the ctrl key and the d key at the same time, and then hit the enter key.
Once you reach a screen that says anything along the lines of "developer mode is enabled," or "OS verification is disabled," Hold the esc key, the ⟳ (refresh) key, and the ⏻ (power) key at the same time for 1-3 seconds again.
It is okay if this screen tells you that Developer Mode Is Blocked! That does not matter!
Once in the Recovery Mode again, Plug your USB drive, SD card, or microSD card into your Chromebook.
You should now be on a screen that looks like this.
From here, hit the b key, and then hit the enter key.
Type in the following command: gsctool -a -I | grep AllowUnverifiedRo and hit the enter key.
If this command does not output anything, or throws an error, your Chromebook does not have a Ti50 chip.
If your Chromebook has a Ti50 chip, click here.
If your Chromebook does not have a Ti50 chip, click here.

Pencil Method
The following unenrollment method is very risky and involves taking apart your Chromebook. There is a significant chance that you brick your Chromebook doing this.
Firstly, Go to Darkn's Filehost and look for your board name. Download the file named after your board.
Secondly, Go to the Chrome Webstore and get the Chromebook Recovery Utility.
Open the Chromebook Recovery Utility, click the gear at the top-right, and click "Use local image."
Select the file you downloaded from Darkn's Filehost.
Plug your USB drive, SD card, or microSD card into your computer, and then select it from the drop-down menu. Hit Continue.
Hit Create Now and wait until it is complete.
Open your Chromebook with a Phillips screwdriver. After that, detach the Chromebook's battery. The methods for disconnecting the connector may differ depending on the model.
Look around the Chromebook motherboard for a little 8-pin chip with pins protruding from the sides of it or sticking into the chip. These chips are typically labeled WINBOND or GIGADEVICE, with either 25Q64... or 25Q128... directly below the branding. You may need to turn the motherboard to find this chip.
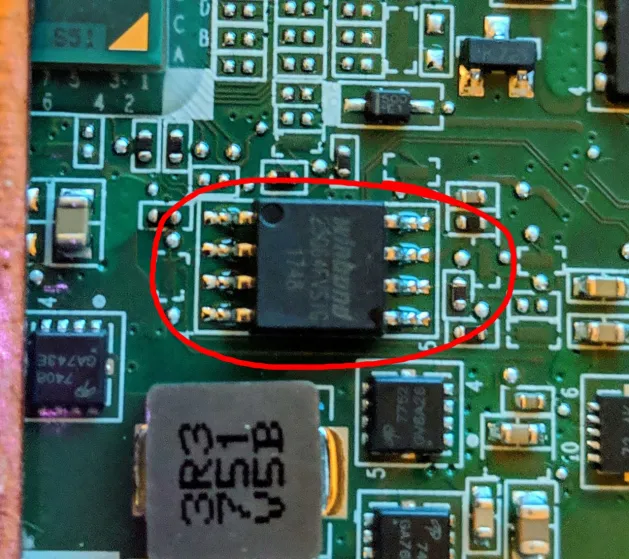
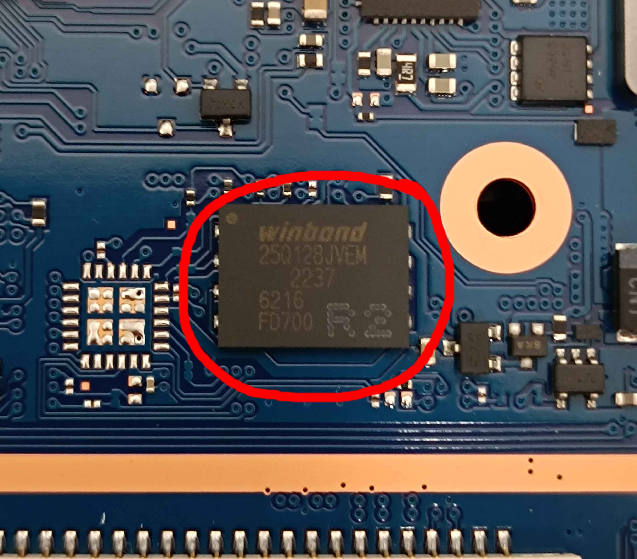
Use a Staple, Tin Foil, Solder Bridge, or any conductive material to bridge the 3rd pin on the left and the top pin on the right. If using something that may come loose, it is recommended to use tape to secure it. Note that the side with the dot is the left side.
Ensure that your conductive material is touching the correct pins and the correct pins only. Doing this incorrectly has a significant chance of permanently bricking your Chromebook.
After you have bridged the correct pins, reconnect your Chromebook's battery, and close it back up.
Turn on your Chromebook.
Now, Hold the esc key, the ⟳ (refresh) key, and the ⏻ (power) key at the same time for 1-3 seconds to enter recovery mode.
Note that on some Chromebooks, the ⏻ (power) key is replaced with a 🔒 (lock) key. In that case, your ⏻ (power) key is located on the side of your Chromebook.
Once in recovery mode, Hit the ctrl key and the d key at the same time, and then hit the enter key.
Once you reach a screen that says anything along the lines of "developer mode is enabled," or "OS verification is disabled," Hold the esc key, the ⟳ (refresh) key, and the ⏻ (power) key at the same time for 1-3 seconds again.
It is okay if this screen tells you that Developer Mode Is Blocked! That does not matter!
Once in the Recovery Mode again, Plug your USB drive, SD card, or microSD card into your Chromebook.
You should now be on a screen that looks like this.
From here, hit the d key, and then hit the enter key.
Then, hit the b key, and then hit the enter key to enter the bash shell.
You should be in a command-line now.
Type in the following command: flashrom --wp-disable and hit the enter key.
Type in the following command: /usr/share/vboot/bin/set_gbb_flags.sh 0x8090 and hit the enter key.
If this does not explicitly tell you that it was a success, you will need to turn off and reopen your Chromebook, and disconnect the battery, to reconnect the pins. Then, Reconnect your battery and close your Chromebook again and try the commands again.
If this succeeded, turn off and reopen your Chromebook, disconnect the battery, and remove the item used to bridge the pins. Then, Reconnect your battery and close your Chromebook up again.
After turning your Chromebook back on, You should now be on a screen that looks like one of these:
Allow your Chromebook to boot into developer mode. This may take a while.
Once it boots into developer mode, and you get to the setup screen, hit the ctrl key, the alt key, and the → (forward) key at the same time.
You should be in a command-line now.
Type in the following command: tpm_manager_client take_ownership and hit the enter key.
Type in the following command: cryptohome --action=remove_firmware_management_parameters and hit the enter key.
If the cryptohome command gives you a big list, Type in the following command: device_management_client --action=remove_firmware_management_parameters and hit the enter key.
If the above note does not work either, you may need to downgrade to ChromeOS v123 (or lower!) Read the downgrading section.
After these commands have been run, hit the ctrl key, the alt key, and the ← (backward) key at the same time.
Finally, Hold the esc key, the ⟳ (refresh) key, and the ⏻ (power) key at the same time for 1-3 seconds.
You should now be on a screen that looks like one of these:
Either hit space to disable developer mode, or use arrow keys to navigate to "return to secure mode" and hit enter to disable developer mode.
Congratulations! Your Chromebook is now unenrolled!

Pencil Sharpener
The following unenrollment method is very risky and involves taking apart your Chromebook. There is a significant chance that you brick your Chromebook doing this.
You may need a CH341A Chip Programmer to do this. It is recommended this kit for SOIC-8 chips and this one for WSON-8. You may also need a system running Linux with flashrom installed.
Firstly, Go to Darkn's Filehost and look for your board name. Download the file named after your board.
Secondly, Go to the Chrome Webstore and get the Chromebook Recovery Utility.
Open the Chromebook Recovery Utility, click the gear at the top-right, and click "Use local image."
Select the file you downloaded from Darkn's Filehost.
Plug your USB drive, SD card, or microSD card into your computer, and then select it from the drop-down menu. Hit Continue.
Hit Create Now and wait until it is complete.
Open your Chromebook with a Phillips screwdriver. After that, detach the Chromebook's battery. The methods for disconnecting the connector may differ depending on the model.
Look around the Chromebook motherboard for a little 8-pin chip with pins protruding from the sides of it or sticking into the chip. These chips are typically labeled WINBOND or GIGADEVICE, with either 25Q64... or 25Q128... directly below the branding. You may need to turn the motherboard to find this chip.


Use a Staple, Tin Foil, Solder Bridge, or any conductive material to bridge the 3rd pin on the left and the top pin on the right. If using something that may come loose, it is recommended to use tape to secure it. Note that the side with the dot is the left side.
Ensure that your conductive material is touching the correct pins and the correct pins only. Doing this incorrectly has a significant chance of permanently bricking your Chromebook.
After you have bridged the correct pins, DO NOT reconnect your Chromebook's battery, and close it back up.
Connect your Chromebook to it's charger, and turn it on.
Now, Hold the esc key, the ⟳ (refresh) key, and the ⏻ (power) key at the same time for 1-3 seconds to enter recovery mode.
Note that on some Chromebooks, the ⏻ (power) key is replaced with a 🔒 (lock) key. In that case, your ⏻ (power) key is located on the side of your Chromebook.
Once in recovery mode, Hit the ctrl key and the d key at the same time, and then hit the enter key.
Once you reach a screen that says anything along the lines of "developer mode is enabled," or "OS verification is disabled," Hold the esc key, the ⟳ (refresh) key, and the ⏻ (power) key at the same time for 1-3 seconds again.
It is okay if this screen tells you that Developer Mode Is Blocked! That does not matter!
Once in the Recovery Mode again, Plug your USB drive, SD card, or microSD card into your Chromebook.
If you do not reach a screen that looks like the following after plugging in your SH1mmer media, click here to fix a non-factory keyroll.
From here, hit the d key, and then hit the enter key.
Then, hit the b key, and then hit the enter key to enter the bash shell.
You should be in a command-line now.
Type in the following command: flashrom --wp-disable and hit the enter key.
Type in the following command: /usr/share/vboot/bin/set_gbb_flags.sh 0x80b3 and hit the enter key.
Type in the following command: flashrom --wp-enable and hit the enter key.
If this does not explicitly tell you that it was a success, you will need to turn off your Chromebook, disconnect it's charger,and reopen it to reconnect the pins. Then, close your Chromebook again, connect your Chromebook's charger, and try the commands again.
If this succeeded, turn off and reopen your Chromebook, disconnect the battery, and remove the item used to bridge the pins. Then, Reconnect your battery and close your Chromebook up again.
If at any point after these commands you get an error saying "owner has disabled downgrading" or "verified images only," please contact v3rtual on Discord.
After this, you will have to put ChromeOS v124 onto your USB drive or SD card.
Go to chrome100.dev and look for your board name. Click "See More" next to it.
Secondly, Find the recovery image that contains ChromeOS v124. The ChromeOS version should be in the Chrome column. Hit the Download button next to it.
Now that you have your recovery image, Go to the Chrome Webstore and get the Chromebook Recovery Utility.
Open the Chromebook Recovery Utility, click the gear at the top-right, and click "Use local image."
Select the file you downloaded from chrome100.dev.
Plug your USB drive, SD card, or microSD card into your computer, and then select it from the drop-down menu. Hit Continue.
Hit Create Now and wait until it is complete.
Turn on your Chromebook.
Now, Hold the esc key, the ⟳ (refresh) key, and the ⏻ (power) key at the same time for 1-3 seconds to enter recovery mode again. You should be on this screen.

Plug your USB drive or SD card into your Chromebook.
After the recovery is complete, remove your recovery media, and allow your Chromebook to boot into ChromeOS.
Once your Chromebook boots into ChromeOS, and you get to the setup screen, hit the ctrl key, the alt key, and the → (forward) key at the same time.
You should be in a command-line now. Log in as "chronos" without a password.
If you cannot log in as chronos, Log in as "root" with the password "test0000".
If you logged in as chronos, type in the following command: sudo -i and hit the enter key.
Type in the following command: tpm_manager_client take_ownership and hit the enter key.
Type in the following command: cryptohome --action=remove_firmware_management_parameters and hit the enter key.
Type in the following command: crossystem dev_boot_usb=1 and hit the enter key.
If the cryptohome command gives you a big list, Type in the following command: device_management_client --action=remove_firmware_management_parameters and hit the enter key.
If the above note does not work either, you may need to downgrade to ChromeOS v123 (or lower!) Read the downgrading section.
After these commands have been run, open your Chromebook WHILE IT IS ON, and reconnect the battery to the motherboard. Close it back up.
Type in the following command: gsctool -a -o and hit the enter key.
Whenever it tells you to press PP, Press the Power Button.
Your Chromebook will restart with developer mode disabled. Re-enable it by holding the esc key, the ⟳ (refresh) key, and the ⏻ (power) key at the same time for 1-3 seconds to enter recovery mode.
Note that on some Chromebooks, the ⏻ (power) key is replaced with a 🔒 (lock) key. In that case, your ⏻ (power) key is located on the side of your Chromebook.
Once in recovery mode, Hit the ctrl key and the d key at the same time, and then hit the enter key.
Allow your Chromebook to boot into developer mode. This may take a while.
Once it boots into developer mode, hit the ctrl key, the alt key, and the → (forward) key at the same time.
You should be in a command-line again.
Type in the following command: gsctool -a -I AllowUnverifiedRo:always and hit the enter key.
After this command has been run, hit the ctrl key, the alt key, and the ← (backward) key at the same time.
Finally, Hold the esc key, the ⟳ (refresh) key, and the ⏻ (power) key at the same time for 1-3 seconds.
You should now be on a screen that looks like this:
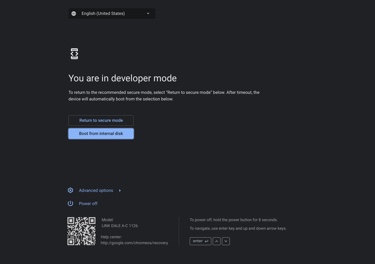
Either hit space to disable developer mode, or use arrow keys to navigate to "return to secure mode" and hit enter to disable developer mode.
Congratulations! Your Chromebook is now unenrolled (and with the most difficult unenrolling method!) You earned bragging rights and your own Chromebook.

Fixing Rolled Keys
Firstly, Turn your Chromebook back off. Open it back up and access your chip again. Remove the bridging material.
WRITE HOW TO CLIP THE CHIP
Connect your CH431A To your Linux system, and open a terminal window.
Run the following command: sudo flashrom -p ch341a_spi To test connectivity. If this command does not output info about your chip, it is not connected properly. Connect it properly.
Run the following command: flashrom --wp-disable
Run the following command: futility gbb -p ch341a_spi -r file.bin
Run the following command: futility gbb -p ch341a_spi -s -r file.bin
Run the following command: flashrom --wp-enable
Once this has been done, Remove the chip clip and put the bridging material back.
Close the Chromebook once again, keeping the battery disconnected.
Turn on your Chromebook, and attempt to re-enter SH1mmer.
If this succeeded, and you can boot into SH1mmer, return to Pencil Sharpener by clicking here.
If this did NOT succeed, and you cannot boot into SH1mmer, click here.

Downgrading
Firstly, Go to chrome100.dev and look for your board name. Click "See More" next to it.
Secondly, Find the recovery image corresponding to your desired ChromeOS version. The ChromeOS version should be in the Chrome column. Hit the Download button next to it.
Now that you have your recovery image, Go to the Chrome Webstore and get the Chromebook Recovery Utility.
Open the Chromebook Recovery Utility, click the gear at the top-right, and click "Use local image."
Select the file you downloaded from chrome100.dev.
Plug your USB drive, SD card, or microSD card into your computer, and then select it from the drop-down menu. Hit Continue.
Hit Create Now and wait until it is complete.
Now, Hold the esc key, the ⟳ (refresh) key, and the ⏻ (power) key at the same time for 1-3 seconds to enter recovery mode.
Note that on some Chromebooks, the ⏻ (power) key is replaced with a 🔒 (lock) key. In that case, your ⏻ (power) key is located on the side of your Chromebook.
Once in recovery mode, plug the USB drive, SD card, or microSD card into your Chromebook.
Your Chromebook will then downgrade to your target version. This may take a while.
Once it is complete, remove your USB drive, SD card, or microSD card. Your Chromebook will now reboot.
Congratulations! You have downgraded your Chromebook!
Return to your unenrollment method below.

Disabling WP
This does not work while you are enrolled (unless you either have never ever been on ChromeOS v114 or newer, or are using the pencil bypass to disable WP.)
Please note that Disabling WP requires you to open your Chromebook (Unless using SuzyQ.)
Firstly, use the following table to figure out how to disable Hardware Write Protection.
| Board | Method |
|---|---|
| Ambassador, Corsola, Dedede | Jumper |
| Banon, Clapper, Cyan, Edgar, Elm(?) Enguarde, Wukong, Glimmer, Kalista, Kefka, Lulu, Orco, Reks, Relm, Sentry, Tidus, Ultima, | Screw |
| Brask, Brya, Nissa | SuzyQ |
| Coral, Grunt, Hatch, Jacuzzi, Nami, Octopus, Volteer, Zork | Battery |
| Stout | Switch |
Jumper
Turn off your Chromebook.
Open the back panel of your Chromebook.
Disconnect the battery from the motherboard.
Find two little holes in the motherboard located next to eachother. They may have text near them that contains "WP."
Use a paperclip, staple, or any other conductive material you can to bridge these jumpers.
Reconnect the battery to the motherboard.
Close the back panel of your Chromebook.
Continue to the Disabling FWWP section.
Screw
Turn off your Chromebook.
Open the back panel of your Chromebook.
Disconnect the battery from the motherboard.
Look for a screw on the motherboard that has text near it that contains "WP." If you cannot find text that contains "WP," the screw may also be surrounded with a conductive material.
Unscrew the screw.
Reconnect the battery to the motherboard.
Close the back panel of your Chromebook.
Continue to the Disabling FWWP section.
SuzyQ
The SuzyQ WP method requires you to have a SuzyQable!
Hold the esc key, the ⟳ (refresh) key, and the ⏻ (power) key at the same time for 1-3 seconds to enter recovery mode.
Note that on some Chromebooks, the ⏻ (power) key is replaced with a 🔒 (lock) key. In that case, your ⏻ (power) key is located on the side of your Chromebook.
Once in recovery mode, Hit the ctrl key and the d key at the same time, and then hit the enter key.
Allow your Chromebook to boot into developer mode. This may take a while.
Once it boots into developer mode, hit the ctrl key, the alt key, and the → (forward) key at the same time.
You should be in a command-line now.
Type in the following command: gsctool -a -o
Whenever it tells you to press PP, Press the Power Button.
Your Chromebook will restart with developer mode disabled. Re-enable it by holding the esc key, the ⟳ (refresh) key, and the ⏻ (power) key at the same time for 1-3 seconds to enter recovery mode.
Note that on some Chromebooks, the ⏻ (power) key is replaced with a 🔒 (lock) key. In that case, your ⏻ (power) key is located on the side of your Chromebook.
Once in recovery mode, Hit the ctrl key and the d key at the same time, and then hit the enter key.
Allow your Chromebook to boot into developer mode. This may take a while.
Once it boots into developer mode, hit the ctrl key, the alt key, and the → (forward) key at the same time.
You should be in a command-line again.
Plug one end your SuzyQable into the USB-C port on your Chromebook, and the other end into any USB-A port.
To make sure your SuzyQable is connected properly, Type in the following command: lsusb and press the enter key.
If you do not see anything containing 18d1:5014 after, try plugging your SuzyQable into different ports on your Chromebook and rerunning the command.
Once you see that, Type in the following command: ls /dev/ttyusb* and press the enter key.
You should see TTY 0, TTY 1, & TTY 2.
After that, Type in the following command: echo "wp false" > /dev/ttyUSB0 and press the enter key. Then type in: echo "wp false atboot" > /dev/ttyUSB0 and press the enter key. Then type in: echo "ccd reset factory" > /dev/ttyUSB0 and press the enter key.
Finally, Type in the following command: flashrom --wp-disable and then hit the enter key.
Congratulations! You have disabled write protection on your Chromebook.
Battery
Turn off your Chromebook.
Open the back panel of your Chromebook.
Disconnect the battery from the motherboard.
Plug your Chromebook into power with a charging cord.
Close the back panel of your Chromebook.
Continue to the Disabling FWWP section.
Switch
Turn off your Chromebook.
Open the back panel of your Chromebook.
Disconnect the battery from the motherboard.
Look for a switch on the motherboard. Here is an example of where the switch may be.

Flip the switch.
Reconnect the battery to the motherboard.
Close the back panel of your Chromebook.
Continue to the Disabling FWWP section.
Disabling FWWP
Once you have disabled Hardware Write Protection, Hold the esc key, the ⟳ (refresh) key, and the ⏻ (power) key at the same time for 1-3 seconds to enter recovery mode.
Note that on some Chromebooks, the ⏻ (power) key is replaced with a 🔒 (lock) key. In that case, your ⏻ (power) key is located on the side of your Chromebook.
Once in recovery mode, Hit the ctrl key and the d key at the same time, and then hit the enter key.
Allow your Chromebook to boot into developer mode. This may take a while.
Once it boots into developer mode, hit the ctrl key, the alt key, and the → (forward) key at the same time.
You should be in a command-line now.
Type in the following command: flashrom --wp-disable and then hit the enter key.
After that, hit the ctrl key, the alt key, and the ← (backward) key at the same time to exit the terminal.
Congratulations! You have disabled write protection on your Chromebook.
You can then undo your hardware WP if you would like to (reconnecting the battery, removing the jumper, putting the WP screw back, unflipping the switch...)

The Bad News
Unfortunately, You cannot unenroll your Chromebook at this time.
Please join the MercuryWorkshop Support Server for news about unenrollment exploits.

Flowchart
Here's a Flowchart that shows you how this Rentry is formatted.


