Texture Baking Tutorial
By Onibushi
In this tutorial you will learn texture baking (AKA lightmapping) for custom towns. Texture baking makes everything look much more realistic and natural, as it "writes" illumination (light and shadow information) on textures.
Requirements:
- 3ds max 7, 8, or 9 (Trial link here)
- Fate Modkit 2 (required only to export .scn) (link here)
- Basic 3d modeling and texturing knowledge
Step 1: Lights
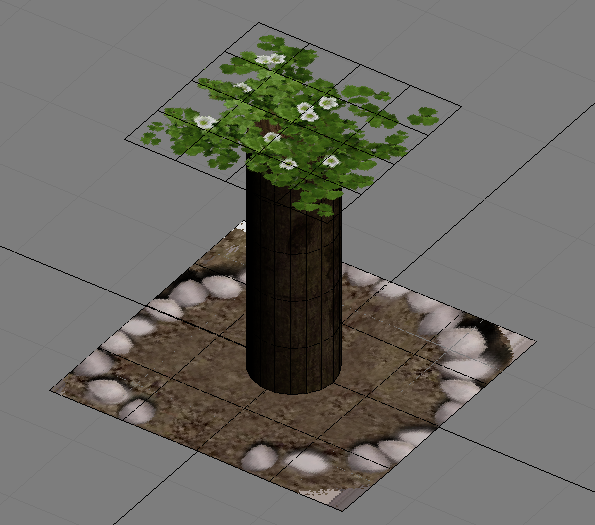
Before this step, we need to have already created the location we are going to use. As an example, I created a very basic model of a... tree? with some leaves and the ground. Textures need to be already applied too.
In order to create illumnination, we need to set a light. In 3s max, go to Create > Lights > Standard Lights > Target Directional.
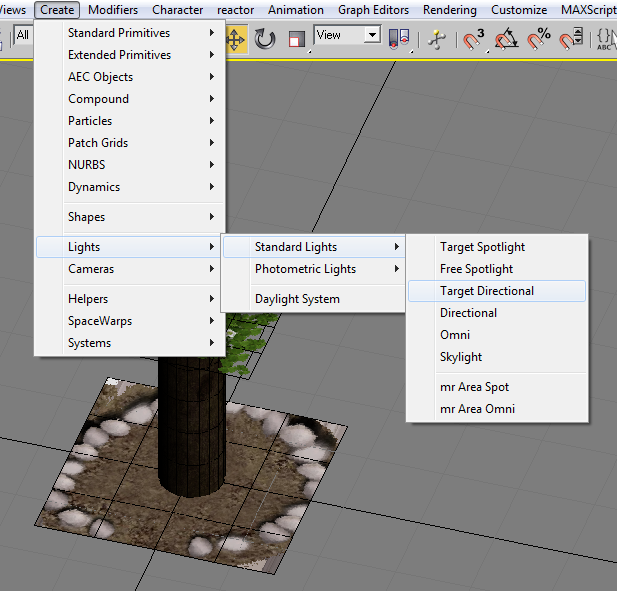
There are many light types, but we are going to emulate sunlight so this is one of the best options to do so. You can put the Light anywhere on the scene, but we need to locate it correctly according to where we want the shadows to be cast. There are 2 objects: Direct01 and Direct01.Target. Direct01 is where the light starts, while Direct01.Target is the maximum point the light can reach. Try to set them like this:
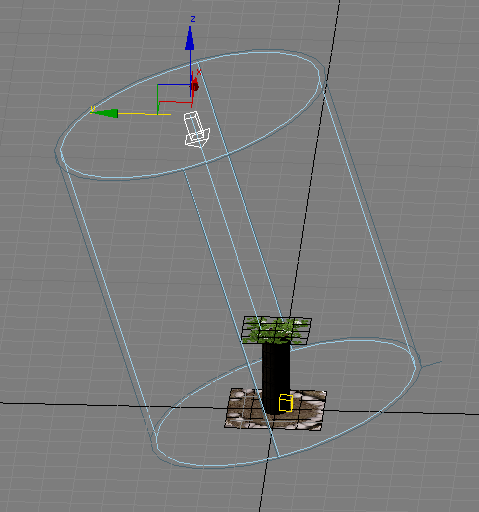
If the scene is larger you need a larger area to cover, to do so simply scale up the Direct.01 object. As this is an example, we just need to cover the tree and the ground.
Step 2: Shadows
You can modify the light color, intensity and shadow depth. If it's too bright or too dark, try changing the following values:
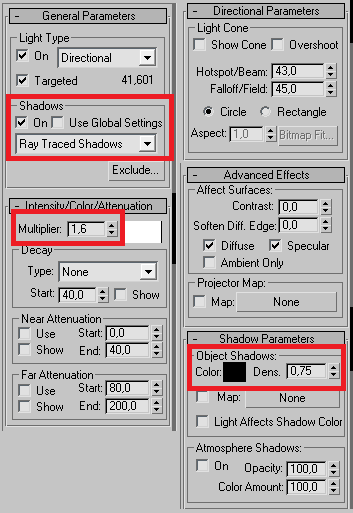
Shadows need to be switched on. Multiplier increases the brightness. And Dens in Shadow Parameters will make shadows look more or less black. You can also change the light and shadow color.
In order to check how are lights and shadows cast on objects, you can simply render. Go to Rendering > Render > Render.
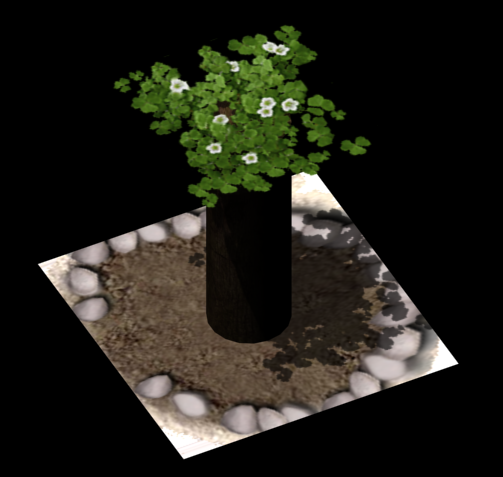
Rendering will display how shadows will be projected on and under every object. If you like the result, move to the next step. Otherwise, re-locate both Direct.01 and Direct.01.Target until you have the desired result.
Step 3: Wrapping
After setting lights and shadows, we need to re-wrap all objects' textures. To do so, add an extra Unwrap UVW Modifier and set the Map Channel to 2:
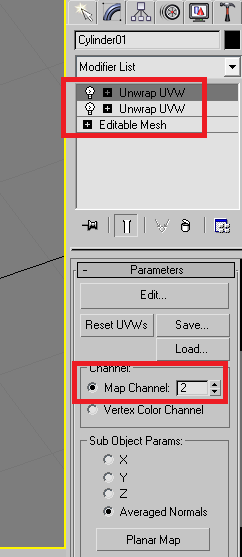
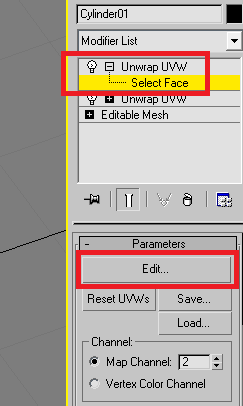
The first modifier (from down to up) contains the original texture map you added to the object. The second modifier (with map channel: 2) will contain the baked texture map. Drop down the second modifier > Select Face and then Edit in Parameters:
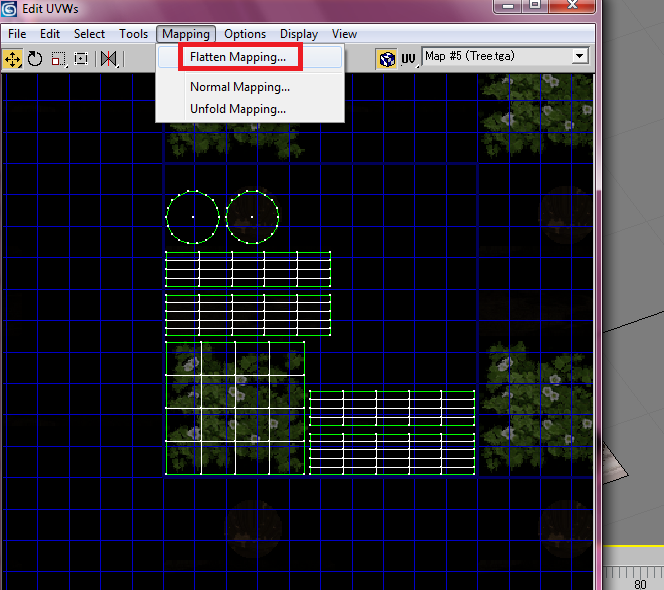
Then select all faces and click on Mapping > Flatten Map. In the image below, faces were already flattened so they already look how they should be according the baked texture. In a custom town, all faces will look messed up. Simply select them all and apply the flattening. There's no need to change anything else, just click on Ok.
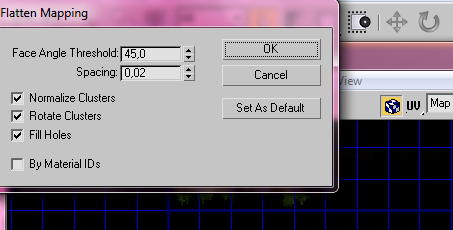
Step 4: Exporting Baked Textures
Now we need to export our baked textures. With the object selected, go to Render > Render to Texture:
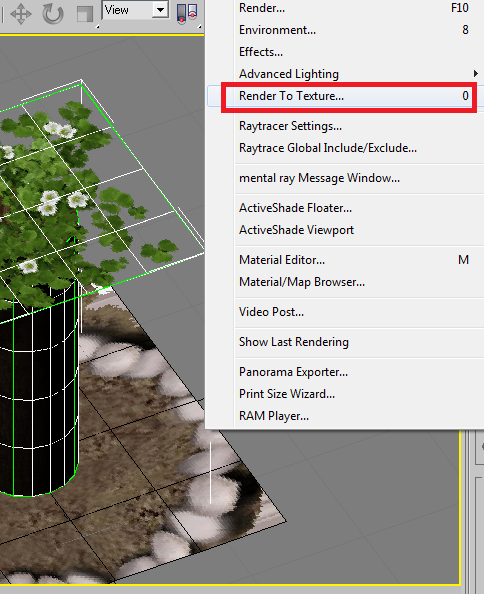
In the Render to Texture window, we need to set the following:
1- Path
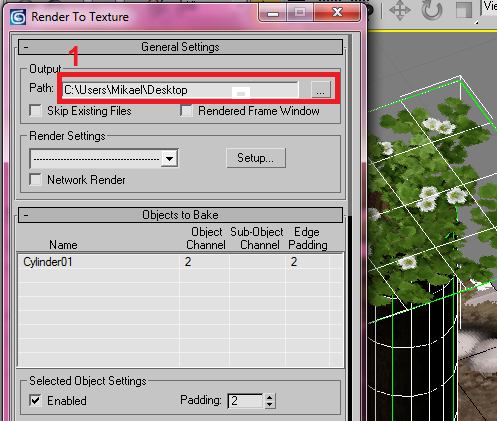
2- Object: Use Existing Channel
3- Channel: 2
4- Add: Lighting Map (There are more types but Lighting is the best for illumination)
5- Diffuse Color
6- Size. It can be 128, 256, 512 or 1024. I recommend 256 for small objects (props), 512 for regular objects (houses) and 1024 for large objects like the entire ground map.
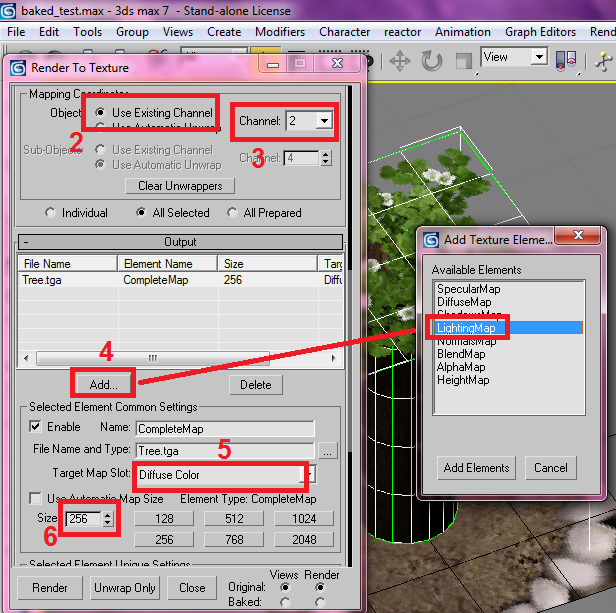
7- Render to Files Only
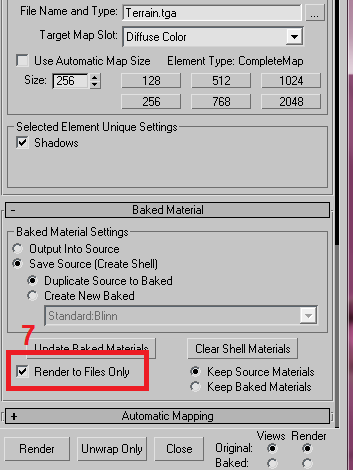
Then click on Render and wait. Repeat the steps for every object in the scene (they can be baked either individually or in groups by attaching them. If you combine them, be sure to use 512 or 1024 baked textures in order to prevent blurried shadows.
Step 5: Adding Baked Textures to the Map Library
After all baked textures were exported, we have to add them to both objects and library. To do so, press M to open the material library and, on an empty material slot, click on Pick Material from Object:
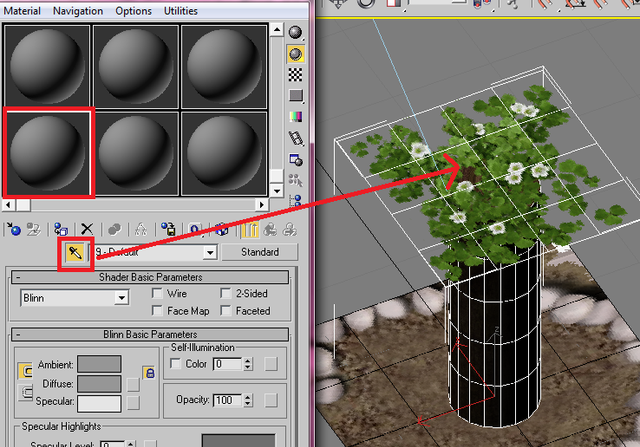
This will select the texture used by the object. If you have multiple textures, they will be added too. If there's a single texture, the map is set as Standard. If there are multiple textures, the map is set as Multi/Sub-Object. In both cases we need to switch them to Shell Material:
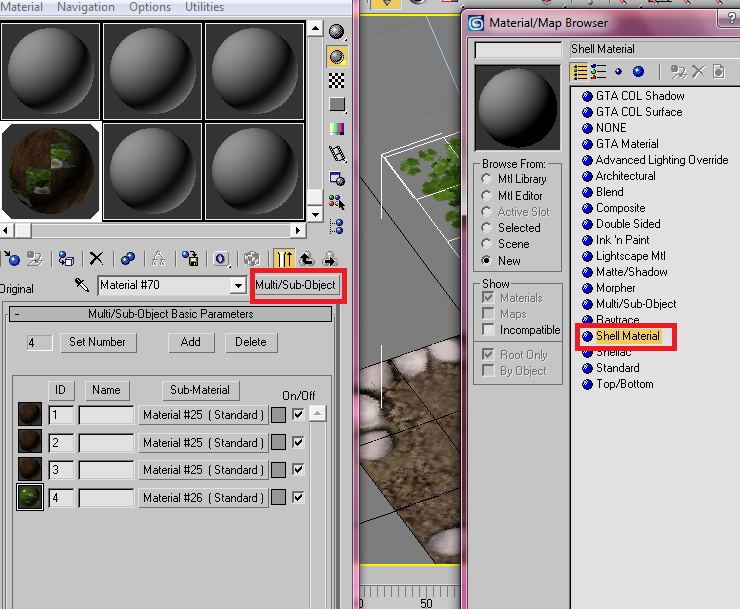
This will create an additional slot for the baked texture. Click on it and add the baked texture as Diffuse Color:
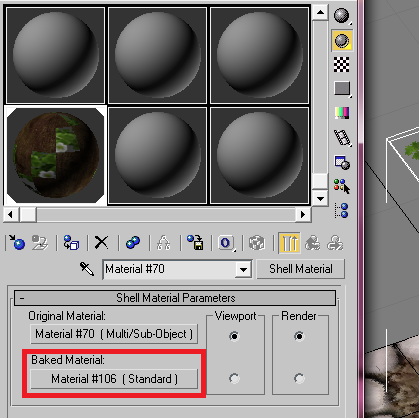
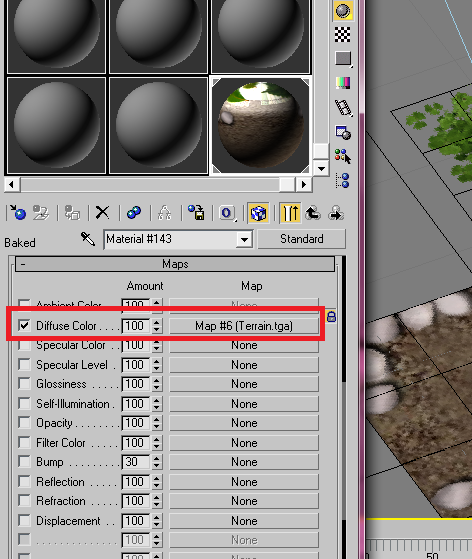
Repeat until you added all baked textures to all objects. After that, you are ready to export the file as .SCN.
If the program crashes, you may need to increase the Memory Heap Allocation for 3dsmax scripts. Go to Customize > Preferences and select the MAXscript tab:
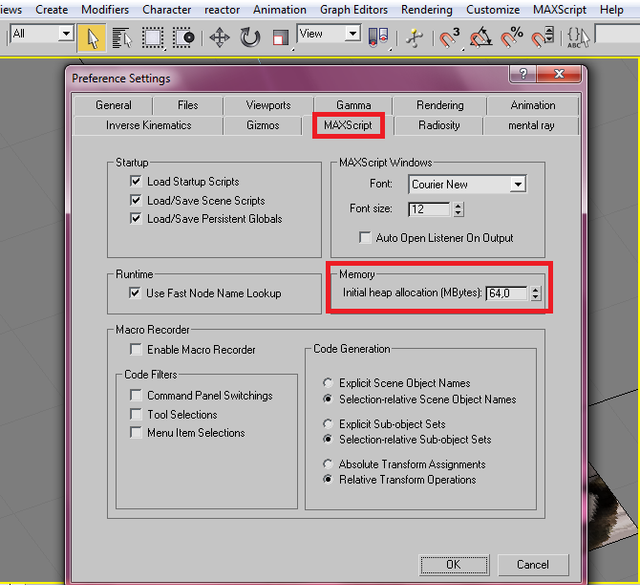
If the amount of megabytes is 12 or lower, change it to 24 or more and try exporting again.
Here an example of before and after:
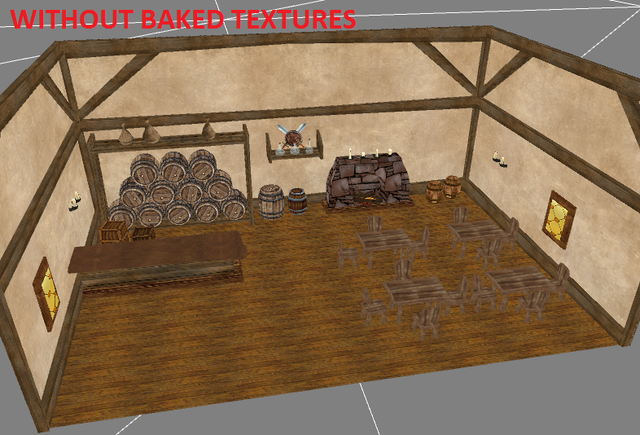
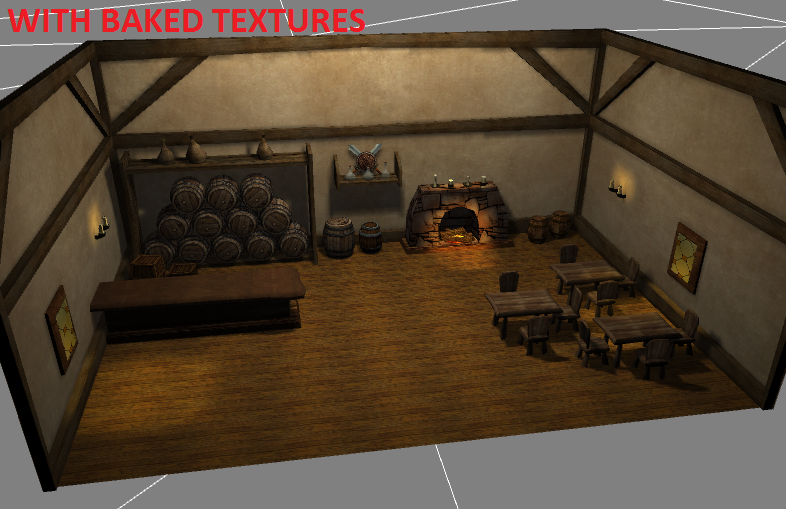
Additional info:
In order to create a smoother light (like the one I used in the inn) go to Create > Lights > Photometric Lights > Target Light.
If you want to emulate direct sunlight then Target Directional is the best (Create > Lights > Standard Lights > Target Directional).
For the small candle lights I used Area Spot lights (Create > Lights > Standard Lights > mr Area Spot).
By the way, Target Directional lights tend to darken too much the opposite faces (the faces that do not receive light) of objects. To improve it (and "enlight" those faces a bit) create an Omni light (Create > Lights > Standard Lights > Omni) and place it near the darkened faces. Give the Omni a low value in Multiplier (Intensity/Color/Attenuation tab), about 0,4 is enough.