How to use RVC Mainline Colab
In this guide, I will be explaining how to use the RVC Mainline Colab notebook to create voice models
I will not be teaching about voice model training and reading tensorboards since there's already guides for it on AI HUB
RVC Mainline is an significant improvement over the RVC Disconnected colab due to the Mangio fork having hardcoded constraints
The way the Mangio fork is handling the training is, it tries to calculate and predict steps count per model ( which can't be 100% accurately predicted) and that is causing, in the long run, steps misalignment. That means, whenever you check the tensorboard later on, for the model, it is not representing the actual / real training points (in this case, saved epochs)
The latest update of the Mangio-RVC-Fork was on 7/27/2023 and has been abandoned
Instead Mainline RVC is up-to-date and uses a web GUI interface that communicates directly with the Mainline colab page, enabling folder sharing and tensorboard training
The GUI will have auto backups to your training progress in case Google Colab kicks you out from your runtime session
Are There Easier Alternatives?
Mainline Kaggle gives you 12 hours per day to train with no captchas or interferences, which is better than Colab since you're limited by 3-4 hours each day. The free T4 X2 GPU is also faster than Colab. If you've already read the steps for this rentry, you'll already be familiarized with how Kaggle works. Read here for the guide on Mainline Kaggle
Ilaria RVC Mainline Colab has training and inference built in. The Ilaria fork is the same as mainline except the GUI is much simpler
Applio Colab is known for their user-friendliness with their GUI. You can check out their guide here
Jump To The Important Sessions
Running The Cells
Pretty self explanatory; Run the first two cells so you can clone the github from the repo and install the necessary requirements
Downloading a Custom Pretrain
If you do not see the custom pretrain that you want under the dropdown of CustomPretrain, insert a code cell in colab

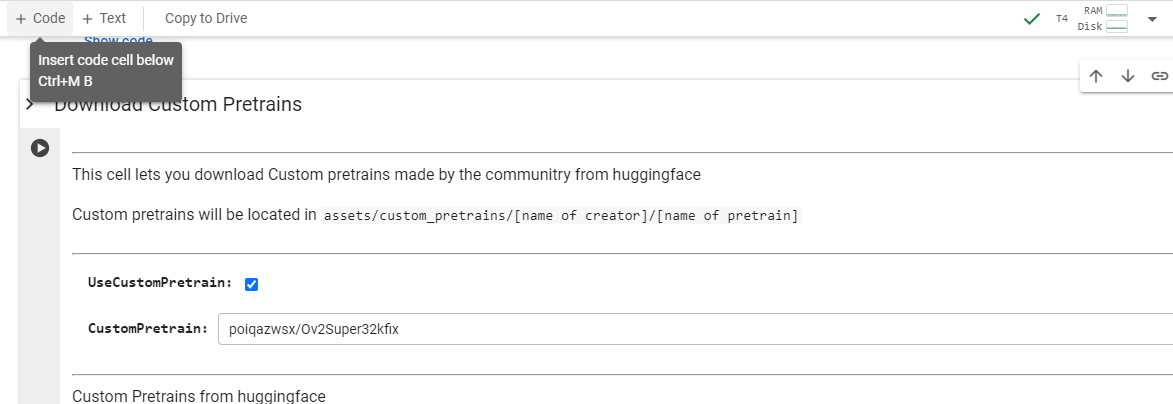
Now use !wget like so:
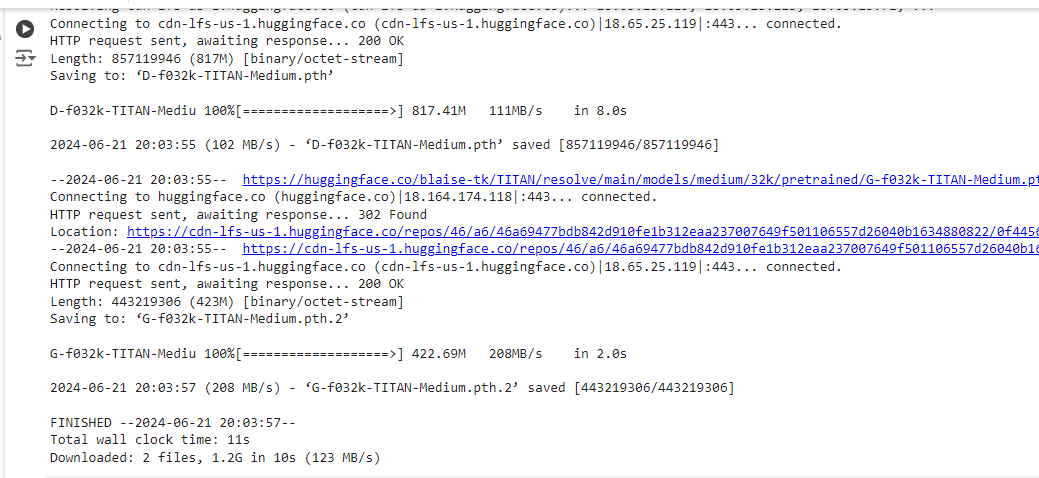
!wget https://huggingface.co/blaise-tk/TITAN/resolve/main/models/medium/32k/pretrained/D-f032k-TITAN-Medium.pth https://huggingface.co/blaise-tk/TITAN/resolve/main/models/medium/32k/pretrained/G-f032k-TITAN-Medium.pth
It should look like this if you've done it correctly with both the D & G files downloaded. Unfortunately you'll have to repeat this step every time you run a new session in Colab
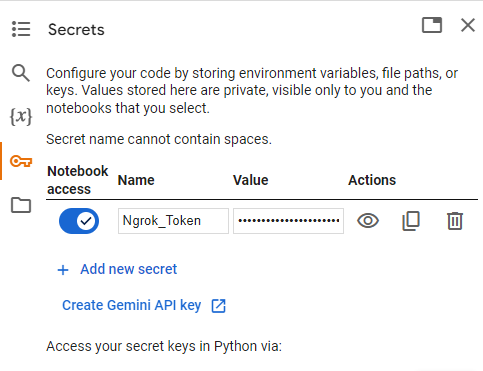
Running The Ngrok Tunnel
Put Ngrok_Token as the name and the Value to be your ngrok token. If you do not have an account, visit here to authenticate your token https://dashboard.ngrok.com/get-started/your-authtoken
Once you ran the cell, the tensorboard will load up on colab and you're given three links.
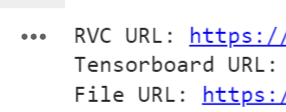
Click on File Url to launch the Imjoy elFinder Web GUI
The Imjoy elFinder Web GUI
The interface should look like this with your D and G files being located here. This is entirely optional, but this GUI can manage your files within colab
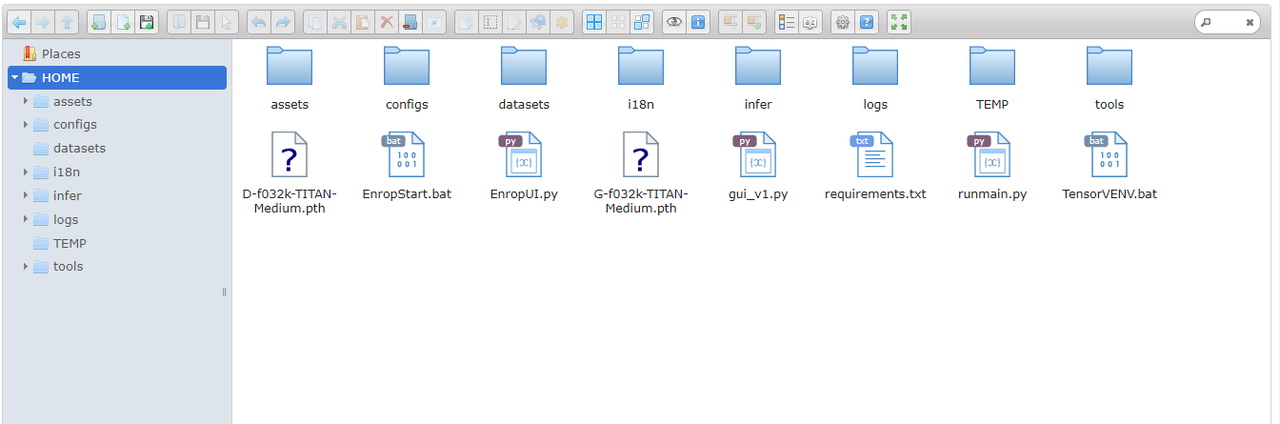
By default, your D & G files are located in the /Content/ and /Training/ folder in colab
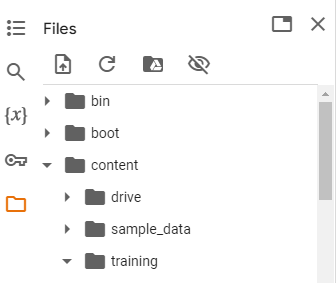
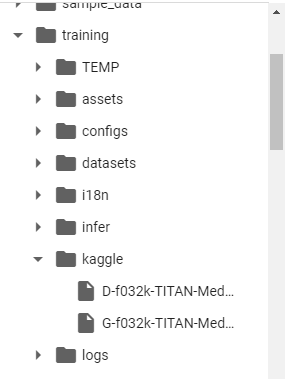
so to make it simpler, you can make a new folder in the Web GUI to compile your pretrains into one place
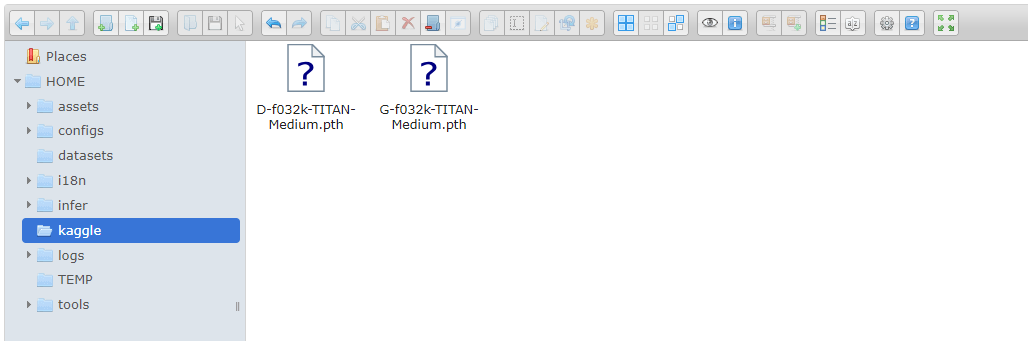
and it'll appear like this:
Opening The RVC GUI
Now go ahead and open up the RVC Url in the mainline colab and it should look like this:
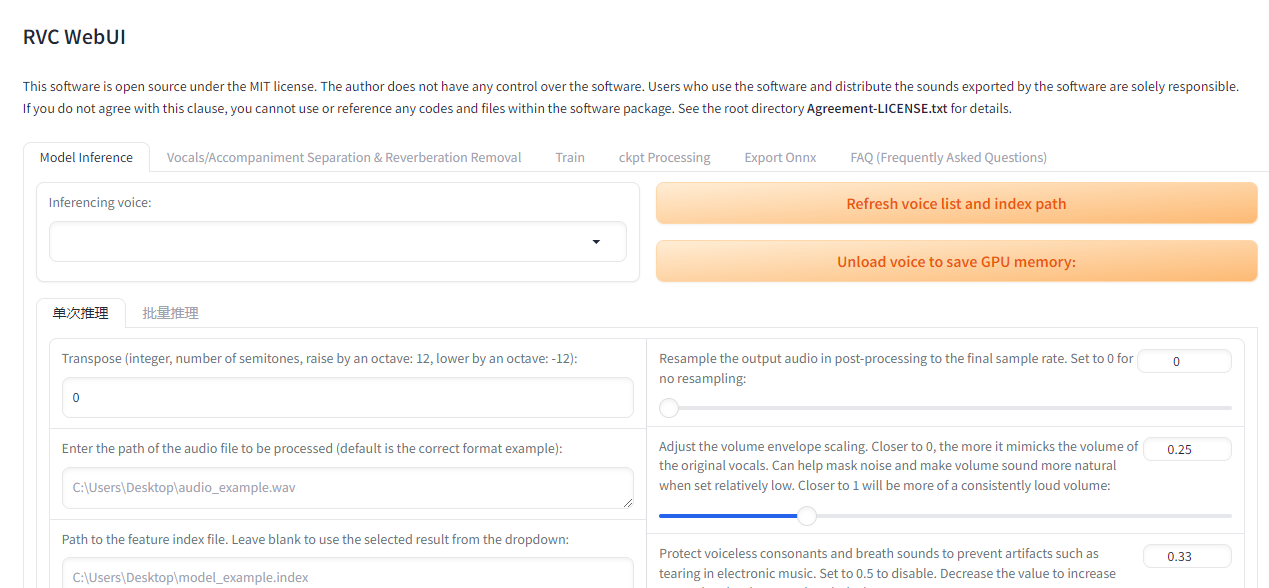
Click on the training tab

Running The Steps
For the target sample rate, make sure you are using v2 only! Or else, you'll receive a size mismatch error with the tensorboard. If you do not see a sample rate of 32k, you need to switch back and forth to v1 and v2 to toggle it. It is not V2 if you do not see 32k just to be clear

Formatting The Dataset
For step 2a, we do not need the Imjoy elfinder GUI
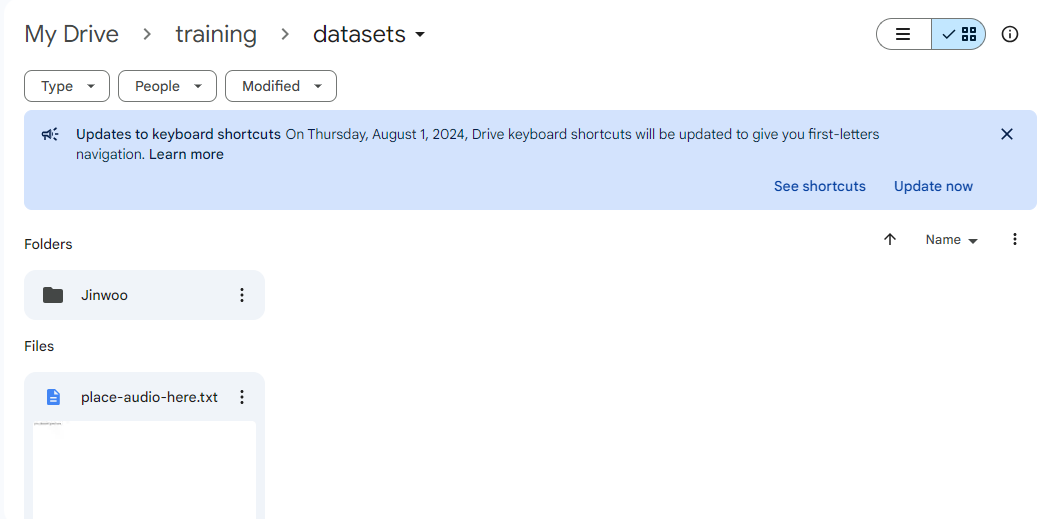
In your Google Drive, you should have a new folder called training
Inside, you'll have a folder called datasets and you'll be able to place your uncompresssed folder of your audios there
Make sure that the folder contains the same name as the model and have either WAV, or Flac files inside. Do not zip the folder
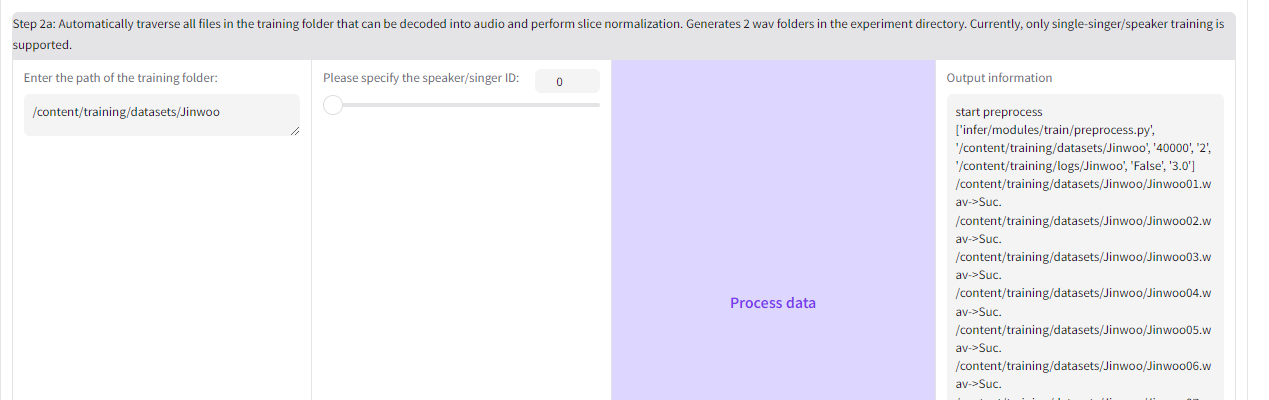
On the RVC GUI, copy the path file of the zip folder from colab and paste it in empty box below. It should preprocess without an error code popping up.
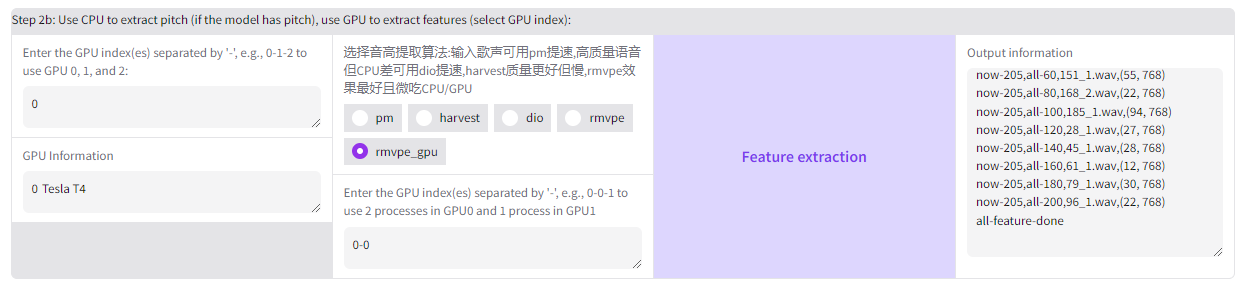
Now we can run the feature extraction in step 2b like so:
Configuring Training Settings
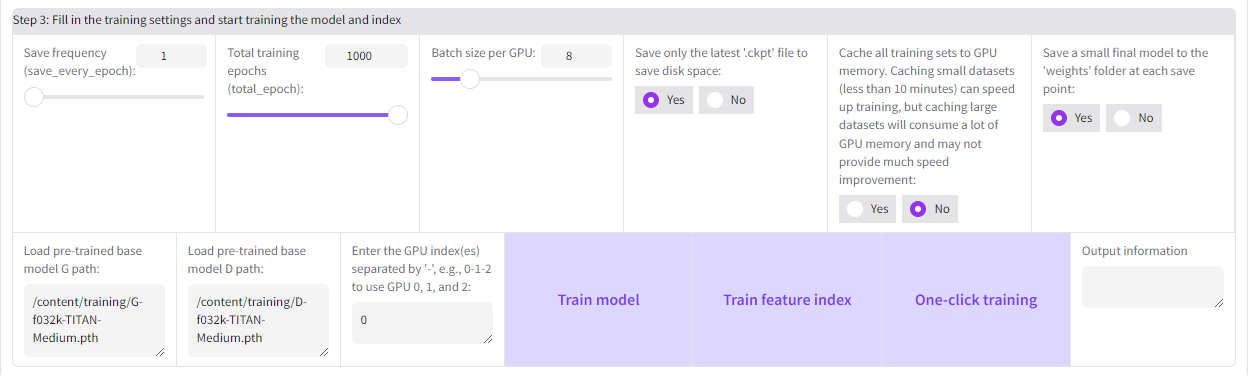
Make Sure To:
- Save only the latest '.ckpt' file to save disk space:
- Save a small final model to the 'weights' folder at each save point:
- if you want more control over monitoring steps/epochs accurately, use a save frequency of 1
- because Colab has limited hours of GPU, it's advised to use a save frequency of 10-25
- Use batch sizes of 4 for short datasets, 8 for minimum length datasets (6-25 minutes), 12-16 for longer datasets
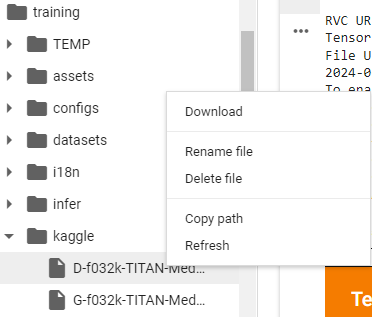
Under the Load Pre-train base model for D & G
you should be able to find the path file locations if you right click here and Copy Path
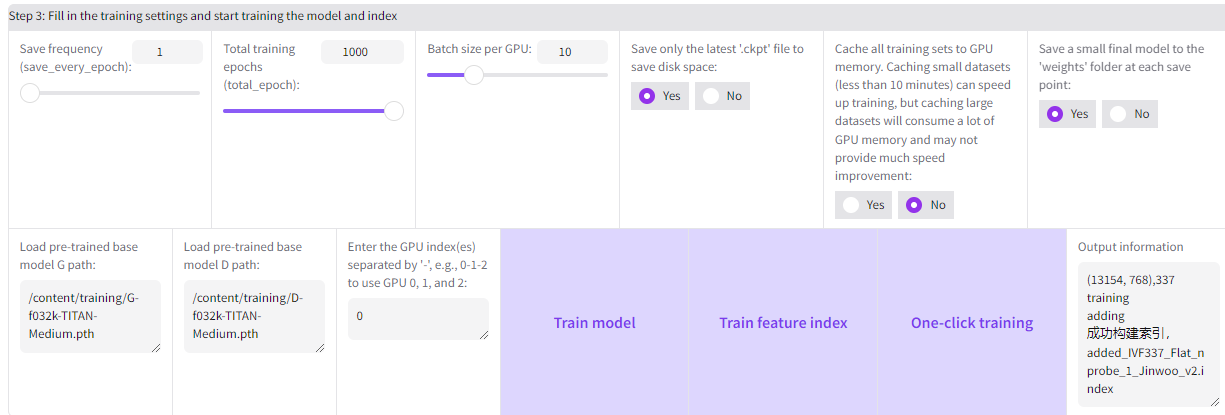
You can now train the index of your model and the added_index will appear on your log folder inside the Training folder in Google Drive. (In the picture it says batch 10, please use 8 instead). Highly advised you read below before you start training the actual model
Manually Syncing Your Graphs
This must be done before the training starts and not after, otherwise your graphs will be desynced by default
I suggest reading this from here so you have the full context on how to do it https://github.com/IAHispano/Applio/issues/405
Please read here to learn how to use the Tensorboard if you haven't already https://docs.aihub.wtf/rvc/resources/epochs--tensorboard/#section-11
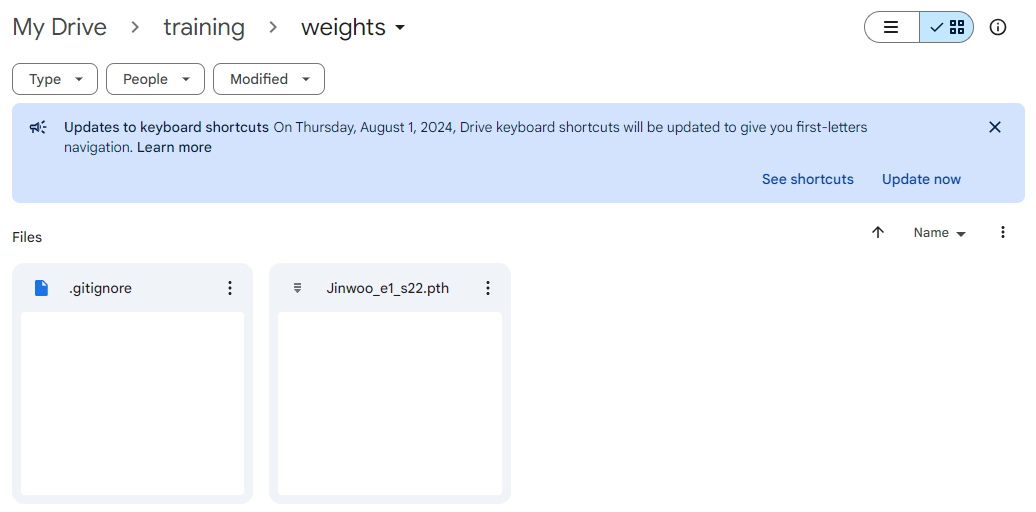
For my model, the first epoch checkpoint I had was 22 steps since I used a save frequency of 1.
If you set your save frequency as 10 or so on, you'll need to wait until the 10th epoch for it to be logged in the /weights/ folder
In the config folders, I modified the log interval of the 32k.json file to "22" since my target sample rate is 32k.
This should be under the /v2/ folder
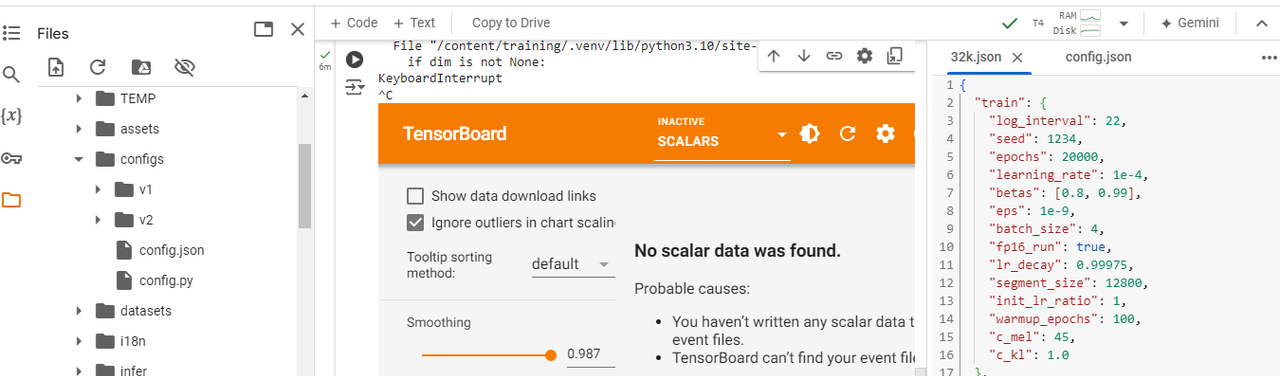
For the config.json folder, it should be located in your logs folder in Google Drive if you can't find it in colab. I modified the log interval to "22" using the text editor and saved the changes made to the drive
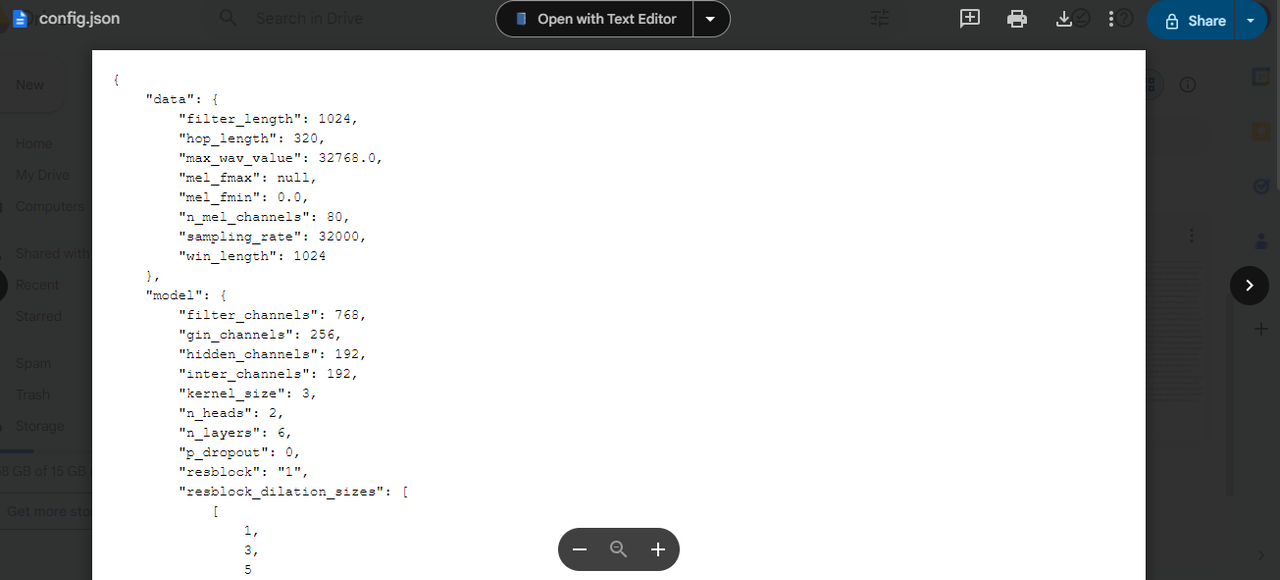
Now you can delete the Eval folder, tf-events file, G & D_2333333 files and train log file in the logs folder of Google Drive and start retraining
Resuming Your Training Session
As said in the github, do not process and feature extract again because those files are already in the logs folder of your Google Drive. Use the same model name in step 1 of the RVC GUI and the same batch size/pretrain/target sample rate/save frequency to the train the model again.
Finished Training
When you have finished training, you can download your .pth files under the /weights/ folder of Colab. Download the ones before overtraining. The Added_Index will be in your google drive folder in the /logs/. Zip both of them up in a folder and you'll have your voice model!